Friday, April 5, 2013

2013 Christmas Card Challenge - April!


April!  Has Spring arrived or is Old Man Winter hanging on where you are?  We've got a mix - 80° one day, 30° the next - snow predicted, but the daffodils are blooming, and my grape hyacinths are up in the flower bed in front of the house.  Who knows what's next?  Spring?  I hope so - Christmas might be my favorite holiday, but Spring is my favorite season.

Let me jump right into the theme for April:  Christmas Icons!

Sounds strange, doesn't it, but when I searched online - there were thousands of images!  Then I really started getting ideas!  Put it this way... I didn't make 6 cards this month. ;)

SO, just for inspiration, I have some of the images I found online.  Here they are:


Alright - on to my samples for April's challenge.  I mentioned that I didn't just make 6 cards this month, I actually ended up with 20, or I should say I STOPPED at 20!

We didn't travel this year for Spring Break, so I had the whole week to play in my craft room in addition to some other things I wanted to get accomplished.

OK, for my first 6 cards - a Christmas Door - what's more iconic to Christmas than a door with a wreath on it?  We made these at a Stamp-A-Stack this past November, and I really loved 'em!  Isn't that antique brad doorknob cute?  I used 2 different brads.


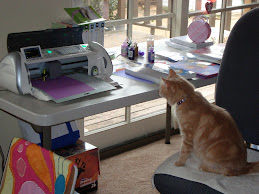
 The wreath was made with the 'new' 1 1/4" scallop punch and a 3/4 inch scallop punch from some of my green scraps.  Gotta LOVE using scraps when you can! Above you can see my craft table.  NO, it's never clean - I just can't work in clean.  It isn't possible. ;)

For the next set of 6 cards, I got out my Jolly Bingo Bits stamp set and had to choose!  There are 24 in all, and in a moment you'll see how I incorporated a few others for the inside and envelope.  They make wonderful Inchies!  I also added some rhinestones and Stickles to add some interest.

 Click HERE for a link on how to make these awesome, easy, quick bows!

 Here you've got the envelope and inside view of these mini-icon cards.
"No naked envelopes" is a quote I heard from Shelli Gardener at the Regional in Dallas last month - It resonates - 'naked envelops' - LOL


Here is the last set - I actually made 8 of these in total 2 of each design, and one red and one green for each icon.
These are a shameful CASE from another Stampin' Up Demo with some of my own touches added.  I remember clearly when I first saw them.    Enjoy!


 Yes, the gingerbread men, trees, cocoa cups, and candy canes hold the card fronts together!
Below is a picture of the inside - I made an extra die cut from the original cardstock for the backing to give it extra strength.

 Here are the envelopes - giving just a little hint of what's inside.


Please leave a comment. Thanks so much!


Sunday, March 24, 2013

Easter Cards 2013

 This stamp set is called Everybunny, and the wheel is Every Egg.

Truthfully, I didn't really consider this set for quite awhile when the catalog came out, but after looking at it and thinking of possibilities, I jumped in and ordered both.

The technique is called a Stair Step Card, and uses a Martha Stewart grass punch, as well as my Spectrum Noir markers.  LOTS of Spectrum Noir markers, as you will see. :)

The two bunnies and hot air balloons weren't so daunting, but when I stamped and started on the egg border, I almost didn't finish it - it took me 3 1/2 days of work to get all the egg borders colored.  On top of that, I fussy cut each one.  Just a comment about that - I really do love how the alcohol markers blend!  They give such pretty effects.

Why so daunting?  I made 7 of these cards for family members.  They went out in the mail this past week, so they should have arrived by now.

 The sentiment, Happy Easter is actually on the back - it just didn't quite fit on the front of the card! :)

Every Egg border (including the two individual eggs-cut off to fit card front)
HB1,2,3; CT1,2,3; CR1,2,8; PP1,2,4; TB1,2; LG1,2,3,4; TN1,2; and BT1,2.

The boy bunny:  TB1,2,6; CT1,2 LY1,3; LG2,3,4; HB1,2,3; BT1; PP1,2; and IG1
The girl bunny:  TN2,3; LY1,3; PP1,2; LG2,3; and BP 1
Hot Air Balloon:  HB1,2,3; PP1,2; TN1,2; LG1,2; PP2,3; BT3,4.

Please leave a comment. Thanks so much!


Saturday, March 23, 2013

Card for a College Friend


 My husband talks a lot of crap about Facebook - he doesn't like it, and uses it begrudgingly... but I really enjoy FB... I can keep in touch with teacher friends from around the country, and most important, keep in touch with cousins I haven't seen in more than 25 years or so.

It also affords me the luxury to keep up with college friends!  I really loved college - it was a great time!

One of my roommates made a comment on FB that her Mom is ill - and after seeing some of her posts, I decided to send her some cheer.


I don't generally make religiously themed cards, but this one was completely appropriate, and I LOVE how the pink and green work together.

Click HERE to see the other gift I sent along with her so she could have some notes to send to her Mom when she couldn't be with her.

BONUS:  HERE is a link on how to make these bows.... SO easy!!  So pretty!!!


Please leave a comment. Thanks so much!


Tuesday, March 19, 2013

February Stamp Club - March!

 Our February Stamp Club meeting was cancelled because of a "snowstorm" here - lots of precautions, and icy roads, so it was just better for everyone to move it one week later.  What a difference a week makes!

Instead of 2 cards this month, we had some that were quick assembly, so there were 3 designs. 

 This one is my favorite by far - LOVE the design and colors!  So vintage with the color scheme - Rich Razzleberry and Crumb Cake with lace embossing, and lace over the darker ribbon.  Even the pearls are 'treated' with Razzleberry.

The next two cards use the Sale-A-Bration paper selection called Sycamore Street.  The apothecary label is a nice background for the butterfly.  I chose not to use a stamp on this so I could customize it as I choose.
I really love this Happy Birthday stamp.... so pretty!


Please leave a comment. Thanks so much!


Tuesday, March 5, 2013

2013 Christmas Card Challenge - March!


Has March "come in like a lion" where you are?  It has here to a degree.  We've been unfortunate enough the past 2 years to have received very little snow.  It's been VERY cold and it's always windy, so I guess that could be considered  "a lion" in some respects.  Spring in certainly on its way, BUT the Christmas Cards keep rolling on here as I am never far out of the Christmas spirit! :)

This brings us to our March challenge!
Since March tends to be so busy - meetings, conferences, Spring Break, planting; or at least planning for it, etc. We still will have our challenge, but you can make it as simple or as complicated as your time allows.

The challenge for March is:  Your cards must include the colors Red, Green and White ONLY! 
They must contain all 3 colors, but no others - no gold or silver accents, no peeps of pink, etc.  Red, Green, White.

I thought about these for quite awhile - and used lots of details as you can see, but got the lot of 6 done in one evening!!  Here they are:


I had some R,W,G Christmas papers that worked perfectly.  DCWV paper stack of course! :)  The circle Joy stamp comes from Inkadinkadoo (I believe), and the rest of the papers, ink, etc. all come from Stampin' Up.

I used some retired products to make this card, just because they were perfect.  Glorious Green Craft ink (ret.) with clear embossing powder, Red satin ribbon (ret.) and a square of red cardstock to mat the stamped piece.


Above you can see the 6 cards for this month's challenge, and below the completed inside of the card, and the stamped envelope to complete the set.


Come join me and have your Christmas Cards all finished before Thanksgiving, ready to sign and send with time spent only to address the envelopes!

Even if you don't have a blog of your own, there are lots of ways to get your photos uploaded for the challenge.

Click HERE for all the rules and regs. for this challenge!


Please leave a comment. Thanks so much!

Sunday, March 3, 2013

Special Order - Sympathy Cards

 One of my coworkers approached me a few weeks ago and asked if I make sympathy cards.  I've made a few in the past, it was always for a friend or family event.

I never find them easy, but they always seem to have flowers.  I dug around in my stash, and found this flower stamp I haven't used in awhile.  I used my alcohol markers to work on the colors, and a technique for the purple paper....  not sure what it's called, but if you look closely, it has a fuzzy appearance.

I also stamped 6 images and colored each to make the 2 pink cards, and 6 images each to make the blue cards.  Why so many?  I hand cut each one of the extra images and layered them on top of the base image.  I then used a dotted background technique from a challenge from the Designed To Color site.


 Click on the photograph below to see a closer view of all the layers for each flower and leaf.

 Click on the photograph below to see a close-up view of the flower's layers.


Please leave a comment. Thanks so much!

Thursday, February 21, 2013

Flowers, Flowers, Flowers!


One of my co-workers mentioned it was her birthday 'tomorrow', and I just happened to have the embossed cloud background waiting for a card!  I saw a card like this, and made many changes to come up with this design.  I punched out the bird from vellum, the Happy Birthday is stamped on a tag, and I used DSP from Valentine's Day as the flower backgrounds with pink flowers in front for dimension.

Lots of people from work stopped by to sign it, and Ms. Clarice loved the card!
I saw this card originally as a "Thinking of You" card.  Since I already had the stamp set out and available, I used the sentiment and small butterfly.  The large butterfly image is punched from vellum and inked in pink. Before mounting the center oval, I made cuts in the pink scallop oval, inked them and separated them a little.  TIP:  Use sharpie on the rhinestones to give the flower centers some color.  This also works on the pearls.


Please leave a comment. Thanks so much!


Saturday, February 16, 2013

Stampin' Up Dallas Regional!

 I am SO SO SO SO SO excited!

There is a Stampin' Up Regional Meeting in Dallas, on February 16th.
Why am I so excited??  Because I'll be there, AND I'll be back in TEXAS!  WHOO HOOOOOOOO

Feels just like "Old Home Week!". :)

I'll be able to tell you more about this even when I return - since it's only the 2nd one I've attended, and this one is a full-day event.

At these huge events - I estimate there will be over a thousand demonstrators there, & swaps are 'encouraged'.  Basically, you come up with  a card design, make however many you want to, and use them as trades.  Give one, get one basically.

I made 3 designs, with a total of 50 of each card.
Now you know why I've been a little absent on the blog lately.  I've been at these for quite awhile, as you'll see.
 1st card:  Rainy-Day Inchies Thank You; Stamps:  Spring Sampler, Perfectly Penned.  Paper:  Bashful Blue, Marina Mist, Whisper White.  Ink:  Tempting Turquoise, Wild Wasabi, Marina Mist, Midnight Muse.  Punches:  Postage Stamp, Decorative Label.  Embossing Folder:  Cloudy Day.  Ribbon:  Midnight Muse 3/8" Stitched Satin.
 2nd Card:  Easter Inchies;  Stamp Sets:  Spring Sampler, Teeny Tiny Wishes.  Paper:  Pretty in Pink, Delightful Daffodil, Whisper White.  Ink:  Wisteria Wonder, Wild Wasabi.  Markers:  Regal Rose, Gumball Green, and Tempting Turquoise.  Punches:  Postage Stamp, Word Window, Modern Label.  Embossing Folder:  Square Lattice.  Ribbon:  Gumball Green 3/8" ruffled ribbon.
***After this picture was taken, I changed the design on the jellybeans, and used the 3 marker colors listed above instead of the pink.

 This card took the most time, and I ended up with 52 of them.  Can anyone say assembly line?
3rd card:  Thank You Blossoms;  Stamp Sets:  Stippled Blossoms, Blooming with Kindness.  Paper:  Certainly Celery, Whisper White.  Ink:  Pretty in Pink, Primrose Petals, Daffodil Delight, More Mustard, Certainly Celery, Wild Wasabi, and Raspberry Ripple.  Die:  Top Note  Embossing Folder:  Square Lattice.

I'll have more to say about this even when we return...  and 150 card designs to play with!


Please leave a comment. Thanks so much!

Thursday, February 14, 2013

Valentine's Day 2013 - Explosion Heart Valentine


Is it Valentine's Day ALREADY!?
2013 certainly is flying by!!!

I made a total of 7 of these cards - and used so many stamp sets!  I'll have to update this post and make a list of all the stamp sets I used.

You can see the "How-To" video HERE that I watched to make the card initially, but I used lots of different things on this card, and some trial and error to make it nice.
 I used some of the retired stamp sets and retired Valentine paper - it's really too bad, because the papers were so pretty, and I wasn't very fond of what was available this year.  I don't call it making do, just using the GREAT stuff I already had!

The fun is when you untie the ribbon, and the card opens.  See below!

 Here you can see the heart opened - The embossed heart on the left is on designer paper, with glossy Cherry Cobbler powder because I know how much my sister likes the feel of that embossing. :)  Just for you, Gail!!


Just enough room under the Be My Valentine to write a short note.

I added the lace behind the card to make it nicer, and needed to come up with a new technique to solve the problem of the lace coming off of the TTT - It worked pretty well, and the lace is staying put.

I made a total of 7 of these - my first sample went to my husband, had orders for 5 from work colleagues, and gave one to someone I work very closely with for his new fiancee.  I got a text this morning saying that she LOVED it!  :)  NICE!


Please leave a comment. Thanks so much!

Friday, February 8, 2013

Operation Write Home - Box 2


 Here are the cards I sent out with my 2nd Operation Write Home box.  The Easter themed cards are due the 7th, with Easter, Spring, and Graduation due later.  Since I made so many Mother's Day cards, I sent them early so they can be divided among units as per OWH's instructions.


 Click on any of the smaller images to make them appear larger for a better view.
  Here I used a retired Stampin' UP set called Easter Blossoms.  I love the image, so I try to use it often.  I used the Elegant Bouquet Flower embossing folder for the background flowers and chalks to color them with pastel colors.  I know I've said it before, but I REALLY love the new stamp pads!  Such nice coverage on the images!  I sent just 4 of these Easter Blessings cards.


 In the OWH box, I included 21 of the Mom cards-  I stamped them about a year ago while working on another project, and with the purchase of my Spectrum Noir alcohol markers, I now feel I can do the stamp some justice!
These are the colors I used:
Mom:  PP2, PP4, LG4, LG5, HB2, HB3, and IB2, IB3.
Remaining stamp areas:  IB2, CT2, FS3, TB1, GT1, PP4, HB2, LG2, IG1

I also punched out vellum and Pretty in Pink cardstock butterflies.  This is the new butterfly punch for the Spring Stampin' Up catalog, and I also used SU rhinestones and pearls for the butterfly bodies.

 I really love daffodils.  When we moved into this house, I planted almost 75 daffodil bulbs that November, and each Spring we have a wonderful daffodil display in the front areas of the house.  They're so SO pretty!!
I made 10 of these daffodil cards, and used these Spectrum Noir alcohol markers.

Stems:  LG5, LG4, LG3, LG2
Flowers:  CT4, CT3, CT2, CT1, OR1
FS1, IG1 and BT1


 Aren't these little bees adorable?  I found this stamp recently at Hobby Lobby and just had to have it for Valentine's day - though it can be used for almost any occasion....
One of the big rules for sending cards to OWH is no glitter, so I used some of my glittered cardstock so it won't rub off.
Spectrum Noir Markers:
Bees:  CT 3 CT4, IG9, IG10
Bee outfit: GT1, GT2

Bees' wings:  BT1, BT2
Shadow:  IG1


Please leave a comment. Thanks so much!


Tuesday, February 5, 2013

2013 Christmas Card Challenge - February, 2013

 Happy February!  Remember, Christmas is coming! 

January's passed, and we are all settling into 2013...  hopefully everyone's had some form of snow or other.  We haven't had much here yet, but I always hope!  If it's very bitter cold, I believe we need some snow just to make it pretty outside since we have to deal with the cold temps.  BUT that's my opinion!  I grew up with snow every winter, and have been missing it a lot of late.

So, first a big THANKS to the participants in the January challenge!  You'll be even happier with those cards when you get to November. :)

Our February theme is inspired by winter.... but not just white or something boring... it's inspired by winter's birds!  I just love seeing Blue Jays and Cardinals out in the snow, their colors so bright against the white background!

February's Challenge:  Winter Birds!  I've included a picture to get you started.  :)


Remember, follow the rules of 6 cards with the exception that if you need more than 66 cards to send, adjust your monthly totals.  Stamp the insides and envelopes as well!  Take your pictures and get them posted in the Linky at the bottom of this post by midnight Feb. 20th.

You can use any type of winter bird stamp for these cards, any company, any..... anything as long as it follows the winter birds theme!  Your imagination is your limitation!

Click HERE to view the entire post with all the rules, including small changes for 2013.

Here are my cards...  I used my Kitchen Sink Stamps to make the cards, and some of my Stampin' Up inks and papers to make it special.  Recipe for the inks follow at the bottom.

Here you can see the 6 cards for the set.
 This is the inside of the card - I used the other Cardinal image, and some darker inks, as well as one of my Stampin' Up sentiments.
 I do have the envelope done, but the photo I took was blurry, and I didn't want to post a blurry pic..... it is finished though, and matches the red Cardinal theme.

 Here is the recipe I used for the Cardinal on the front of the card:
Pine Branch:  1.  Certainly Celery  2.  Wild Wasabi   3.  Close to Cocoa (ret.)  4.  Early Espresso stamped off 1x.
Cardinal:  1.  Riding Hood Red stamped off 1x  2.  Riding Hood Red  3.  Cherry Cobbler   4.  Tuxedo Black (Tsukineko)
Sentiment:  Stampin' Up - Riding Hood Red.

Recipe for the inside of the card:
Cardinal:  1.  Riding Hood Red  2.  Cherry Cobbler  3.  Bravo Burgundy  4.  Tuxedo Black (Tsukineko)
Sentiment:  Stampin' Up - Riding Hood Red


Please leave a comment. Thanks so much!


Monday, February 4, 2013

Stampin' Up Card Club - January, 2013


 As always, our Club leader Kathy has come up with some VERY nice cards!

This first card uses a new stamp set and punch available in the new catalog and Sale-A-Bration brochure.  I know I'll get lots of use out of these small punches - especially layering with the larger curly label punch!


This card is STUNNING!!!  I know I'll be making more of these - can you see it with Red, White, and Blue theme - Stars, banners, etc.  What about Red, Green, Gold/Silver for Christmas?  What about shades of greens and shamrocks for St. Patrick's Day?  OH!  Black, Orange, Yellow, with pumpkins/ghosts for Halloween?  Definitely an idea to play with!
 
 Once you've gotten the dovetail trick down, it goes pretty quickly!!!


Please leave a comment. Thanks so much!

Counselor's Day


Today, February 4th we are celebrating Counselor's Day at school.

I made this card for my team to present to our wonderful counselor!  I work closely with her, getting advice and with one of our testing programs.

I really do appreciate her!
This is the card I came up with.  It's a little busier than my usual work, but in person, it's quite stunning if I do say so myself.

I already had the background stamped with the pink flowers for another purpose, but it didn't quite work for that project.  I took another look at it, and it was perfect for this card.  I stamped another pink rose, and fussy-cut it to make it stand out a little more.

The sentiment "Just For You" is from a retired set called Tagtastic.  It's too bad it's a retired set - I really like the detail on the stamp with the spaces for some extra coloring detail.


Please leave a comment. Thanks so much!


Tuesday, January 29, 2013

Dinner Invitation - Someday!

Last December I had a dinner party with our neighbors one evening between Christmas and New Year's.   We had a great time, and wanted to take the opportunity to get together again.

 These are the invitations I put together for this year's dinner party.  Problem is, it hasn't happened yet!  We planned it again before the new year but my husband got sick, and the neighbor got sick as well, so we postponed the dinner party.

The menu is all planned!   3 great appetizers,  a delicious main dish, 2 great sides, and a special cake for dessert.

Here we are at the end of January, and time has flown so fast.... things get busy, and I still have the invitations here!

They're just waiting for a 'date'!  I hope we can get a night everyone can come over before March!! :)


 The intention wasn't for it to look so Spring-y - I'd asked my husband what color I should use for the base, and he requested green.  Even though it's a dinner invitation for mid-winter, it sure has that Spring-y feel!!  **Next time I'll use Christmas trees! :D


Please leave a comment. Thanks so much!

Monday, January 28, 2013

Birthday Card - LOVE those Stippled Blossoms!

Yes, a birthday card, but right at this moment, I don't know who it's for yet.  I saw a card similar to this with the scalloped edge at the bottom, and of course, since I'm really hooked on the Stippled Blossoms right now, I thought I'd play with it a bit.


 I find it a little curious that the reds and greens keep their layers, but the two pinks seems to lose definition.  I wonder why.  Hmmmmm

Large flower:  Primrose Petals, Raspberry Ripple
Small flowers:  Pirouette Pink, Pretty in Pink
Leaves:  Wild Wasabi, Gumball Green.

I'm still in the middle of working up two big projects so it might seem I'm not crafting much, but I'm actually in overdrive!  Postings will come in time.

Please leave a comment. Thanks so much!

Sunday, January 27, 2013

2013 CCC - January's Winner!


 CONGRATULATIONS

JPScraps 


 As per the new rules, you have one entry in the March drawing for the Christmas Card Challenge prize!

The new challenge is posting on February 2013!
I have lots of people telling me they want to play along, so as we go this year, there will be some people joining in.

It's VERY exciting!

Please leave a comment. Thanks so much!

Sunday, January 20, 2013

2 Silly Kitties!


I've been working in my craft room a lot lately on some projects that I can't quite post.... BUT I did take these pictures!

This is usually how the kitties hang out...  sometimes "Poopie" hops in with Sandy on the top level.

 Sandy at the top, Hankie in the middle, and Witchy Poo (Poopie) on the back of my recliner. 


These are the pictures I took of the 2 silly kitties!  Hankie just won't open his eyes... too smart, I guess because he doesn't want to get shot in the eyes with the flash.  He's a good cuddler, and very talkative!

 Here's a Poopie... he sure looks like a devil cat with those shiny eyes, but he's very sweet, and will beg and bother you incessantly for treats!  He's a good cuddler too!  A very sweet kitty.


Hope you've enjoyed my quick kitty post! :)


Please leave a comment. Thanks so much!

Tuesday, January 15, 2013

Nephew's Birthday Card - wit

 I ordered this stamp set quite awhile ago, and it was waiting for just the right time to debut.  Lots of details in this card for my nephew's birthday....  going to have to do some math to figure out how old he is.

The medallion is stamped twice - cut once to pop off the page as well as the center piece.

 Colors used:   Bashful Blue, Pacific Point, More Mustard, and Early Espresso ink, Bashful Blue & Midnight Muse cardstock.  Scalloped circle and circle punches, and the striped embossing folder.
 Here you can see the dimensions in the card's medallion.

 What's a wit?  Nick just purchased his first home, so he needed a gift WITh his card. :) 


Please leave a comment. Thanks so much!