Sunday, December 16, 2012

Still Here! So Busy!!

Good Sunday Morning!

WHEW it's been busy around here!
Mom and I got the calendars done earlier in December, and I'm getting the pictures ready to post on the blog.

I'm getting the Christmas Card Challenge going again for 2013.  I was so happy to be unstressed in getting my Christmas cards out this year!  What a wonderful thing!

I've been wondering if you'd be interested in a Birthday Card Challenge for 2013!  It would run on different dates, but I sure could use a good supply of differently themed Birthday cards!  If I do a few every month, it's nice to have a supply!

SO, if you would, take a moment to vote ( on the right) on doing a B-day card challenge, I'd really appreciate it!

I'm off to bake more cookies!  I took a class on how to use fondant, so I'm going to have beautiful Christmas cookies this year!

Pics coming! :)

Your comments are treasured!

Sunday, November 25, 2012

November's Christmas Card Challenge - Winner!


This was the final challenge for 2012's Christmas Card Challenge.  So many wonderful cards submitted!  I'd like to thank the participants who took part in the challenges - and made some really beautiful cards!

November's winner is:

JPScraps!

Congrats, Jamie!  I'm so thrilled you took part in so many challenges. 

Now a break for the cards to get out in the mail.

The Christmas Card Challenge will begin again January 5, 2013!

Thank you so much for your comments!

Saturday, November 17, 2012

Gently Falling - Thank You's

Just before Thanksgiving, we are providing all of our support staff a token of our gratitude for all they do for us, and how much they help us accomplish what needs to be done.  This is one of  a set of 4 duplicate cards.

I made this card with the Gently Falling stamp set from Stampin' Up.  I'm not generally a fan of Autumn things, but this set is so versatile, I just had to make the purchase.  I ordered it in wood since it's a two-step stamping layered set.  This way I can make a permanent Stamp-a-ma-jig template which makes the stamping and projects go SO MUCH faster!

I used Cajun Craze cardstock with the leaves stamped in Versamark (watermark) ink, Debbie Mumm Harvest and Holiday stack for the patterned cardstock,  the Thank  You is cut from the Beyond Birthdays cart in Cajun Craze cardstock, and Cherry Cobbler ribbon.   The leaf uses Old Olive and Cajun Craze ink for the base and is stamped with Versamark and embossed with gold embossing powder for the top overlay.

Your comments are treasured!

Sunday, November 11, 2012

Notecard Set CASE

 
I saw a beautiful note-card set from one of the Stampin' Up Demonstrators using one of my very favorite stamp sets!  I just had to CASE it.  What is a CASE you ask?  It means Copy And Share Everything.  Many of the demo's are very generous with their wonderful projects which allows others to copy them, and share the amazing ideas they've had.

The set includes 6 note-cards in varying color sets with matching envelopes.

 This is the finished piece with all the note-cards and matching envelopes inside.  I stamped and used another flower embellishment to finish the decoration on the outside as well as covering up some of the ribbon used to close the card set.

 This is the inside view - it's two regularly sized envelopes trimmed and put together, with some decoration on the inside.

Notes on the colors I used - all the leaves are stamped Certainly Celery with Wild Wasabi as the top layer.  The small yellow flowers use Daffodil Delight and Summer Starfruit, the pink flowers use Pretty in Pink, and Primrose Petals.  The rest of the colors for each card below are for the large center flowers.
 The first flower is stamped with Primrose Petals and Raspberry Ripple as the top layer of color.
 The yellow flower is Daffodil Delight and More Mustard as the top layer.
 These two are retired colors, but SO SO pretty.... Always Amethyst as the base color, and Lovely Lilac to add details on the top layer.
 This darker red flower is a Raspberry Ripple and Bravo Burgundy combination.
 Here for the blue is Pacific Point for the base, and Midnight Muse as the top layer.
 The coral flower uses retired colors as well - they are Cameo Coral base with Calypso Coral as the top layer.

 Here you can see all the cards laid out with their matching envelopes below them.
 Here are two more close-ups of all the cards.

Other materials I used:
126745 Stippled Blossoms - wood
123052 Blessings from Heaven - clear
126151 Friendly Phrases
107311 Note Cards and Envelopes - 3 sets
107301 Medium Envelopes, Whisper White 1 pkg.
Assorted Inks listed above.

**I started purchasing the Two-Step Stamping sets in wood again - instead of purchasing all the stamps in clear - that way I could make a permanent Stamp-A-Ma-Jig template.  It's worked GREAT so far!!  It really speeds things up when stamping.


Your comments are treasured!

Monday, November 5, 2012

2012 Christmas Card Challenge - November and Final Challenge


Here it is - November - the last Christmas Card Challenge for 2012.   I'm sitting here writing this post with my favorite Christmas music going on the background, thinking about how this Christmas Card Challenge worked out this year.

I'm SO grateful for all the submissions, and truly hope there will be more next year.  I've already planned out the 2013 challenges, made a new logo/header, and am thinking about some (very small) changes.  I stayed pretty close to the plan I had with some changes as the months went along.  

BIG Congrats to JPScraps who participated in so many of the challenges!  She now has a fantastic collection of Stickles and many different sets of stamps.  Each month, I sent out a set of Christmas themed Stickles and a stamp set (hopefully I didn't duplicate any of them).

SO, here is the very last challenge:  

The theme for November is:  RIBBON!  

Use ribbon in any/all creative ways you can think of for your Christmas cards!  Remember, Christmas is coming!

 I saw these cards on a Stampin' Up website, and just LOVED them!  I used the same stamp set a few challenges go for the Christmas Tree Shape cards, and just had to give this a try!


 The cards use the Scentsational Season Framelits Dies, actually named "Holiday Collection".  The ribbon is:  Chocolate Chip Scallop Dots 1/2" ribbon, Lucky Limeade Ruffled Ribbon 3/8" ribbon, and Real Red White trimmed Taffeta 1/8" ribbon.  I used Terrifically Tacky Tape to secure the ribbon on the back of the card, and on the side edges so the card wouldn't lift off the base.  The star above the tree is the Champagne glitter paper punched with the star from the Merry Minis Punch Pack.

SO, at the very end of this year of challenges, you should have had 66 cards finished at 6 per month of the 11 month.  I counted tonight as I prepared the post, as as you've seen throughout the year, I actually made more!  12 miscellaneous cards for me from various challenges and some requests including 4 for Mom you saw earlier on the blog with the red/green ornaments she requested, and the 50 card order I completed for my friend.  That makes:  132 cards in all!!!!  72 of which are available for me to send out.

The next dilemma I had was who was getting which card!!??  How was I ever to pick!?  Well, my friend Dee solved that one for me on our most recent weekend card making/crafting day.  She said, "Write them all out, put them in envelopes, THEN address them.  Then you don't know who gets what, but they all have a handmade card from you."  BRILLIANT!  It makes the choosing so much easier!

Alright - I'm done rambling on now, so here goes for the last time this year:  Make your 6 (or more) cards based on the theme, and enter them into the linky below BEFORE midnight CST on November 20th.  The prize winner will be announced and awarded on the 25th of the month, just one month before Christmas, and just in time to get your cards out in the mail for a Christmas Card delivery!

THANKS so much for hanging in with me all year, and PLEASE join us next year!

Don't forget to vote from November 21 - 24th for your favorite!


 Your comments are treasured!


Wednesday, October 31, 2012

Happy Halloween!


 Happy Halloween!

This is always such a fun day!  I didn't realize I had the Spooky Bingo Bits stamp set, so with my recent purchase of the Stamp Punch, I decided to play around with it a little.  At Hobby Lobby yesterday, there was a package of Halloween paper just calling my name.... so here you see the background paper.

Please enjoy!


This card I LOVED the second I saw it....  it's a CASE from another Stampin' Up Demonstrator, and SO adorable!


You won't believe how easy this is to make:  Heart punch, cut in half, 'clipped' with the small circle punch.  The large star punch (ret.) *just one star prong!  The large circle punch, twice to make the curve, and then the jewel tag punch for the 'teeth'.  I had the stamp from Hobby Lobby for a few years, embossed in Tangerine Tango powder, then sponged the Daffodil Delight pieces with  Tangerine Tango ink.  SO SO cute!!!

Your comments are treasured!


Tuesday, October 30, 2012

My Little Halloween Kitty


It's really difficult to get good pictures of my little black kitty...  not SO little anymore, but he is the youngest, and the baby. :)  

He was sitting there watching me finish up a Halloween card, and was so content instead of running around chasing the other two like he does, so I took the opportunity to get a good picture of my little Poopie.


 Who would have thought that a black kitty could be so very very sweet.  He might not be a long haired furry baby like my other two, but he is a GREAT cuddler! 


Your comments are treasured!


Sunday, October 28, 2012

The Stampin' Up Annual Ultimate Stamp Camp!

Every year, our Stampin' Up Club Demo Kathy has an Ultimate Stamp Camp.  Due to the fires in Mannford, OK this past summer, the camp was unavailable and she had to scramble a bit to find a different location.

We landed in a GREAT location that worked out very well (or at least I thought it did)...  and though I'm only showing the 2 projects I made, she had almost 8 projects for the ladies to work on over the two-day event.

I had a big Christmas Card order (as you saw from a previous post) that needed to be completed, so I made the following 2 projects, and then used the time and generous work space to really get some work done.... AND I could go home and sleep in my own bed.  Win Win!!


These are stone coasters!  Aren't they FANTASTIC!  We used Staz-On ink to make them, baked 'em in the oven to set the ink, and added felt feet to the bottoms.  

This purple set with the G is for my sister.  I had Mom and Dad take it with them when they left to go back home after their short visit.  I am making more for Christmas gifts, but wanted her to have these right away. 
 This is my set... they are already in use!  Since we have so much wood furniture, I am considering making another set in browns.  We'll see. :)
 Here you can see the packaging and storage for the stone coasters. 
I've already got 4 more sets already made for Christmas gifts... just need to complete the boxes, and wrap them in the tulle.  


 This framed piece was in our most recent Stampin' Up Holiday Mini catalog.  It's actually much easier to make than you can imagine.  One trick I learned (the hard way) is to make sure ALL the paint is dry before you start putting the piece together.

This piece will also go to my sister for Christmas.  I hope she likes it!!
 Here's a close-up of the center - that champagne paper is "sparklier" in person than it looks in the photos...  SO SO pretty!  I also used a thicker piece of tulle for the bow at the top of the tree.


Your comments are treasured!


Saturday, October 27, 2012

Mom just HAD to have Red and Green!

 When we got home from Stamp Club Monday night, Mom said she just had to have red and green for Christmas colors on these ornament cards.

YES, she really liked the Espresso/Crumb Cake card we made at club, but wanted a set in red and green.

At my craft desk, I had the new In-Colors handy:  Raspberry Ripple, and Gumball Green - so I spent some time playing with the designs.

When I saw this stamp and die set bundled in the new catalog, I knew I'd get lots of use out of them, but I had no idea I'd actually use it this much....  love the stamp set!!!


 These two cards were made at the same time, but I mixed and matched the colors - wasn't exactly sure how Mom wanted these, so she gets both kinds. :)


 As I've said before, I really LOVE these new ink pads Stampin' Up has designed for us, but sometimes the sponging edges is tricky.  Have to be careful how much ink gets on the sponge, or you have splotches.


Your comments are treasured!


Friday, October 26, 2012

Stampin' Up Card Club - October, 2012

 Our October Cards:


I really like this card - the extra layers really make it nice in person.  I admit I didn't choose the sentiment very well, but just went with what was on the stamp block already.  I keep the cards we make, and then reproduce them - so it's mine anyway. :)  MINE, I tell you!  (LOL)

I REALLY love this card - basically a simple design with lots of great detail.... Lacy Brocade embossing folder, En Francais background stamp, layers, stamps and die cuts, some bakers twine and a pearl.  So many basic items - but put together SO well!

Kathy, as usual did a fantastic job.


Your comments are treasured!


Thursday, October 25, 2012

2012 Christmas Card Challenge - October's Winner!


TWO MONTHS to Christmas!

Are you ready?  Have you started your Christmas shopping?  Have you finished your Christmas shopping?  Do you shop for Christmas, or make gifts yourself?

I want to congratulate Jamie for winning the October 2012 Christmas Card Challenge!  She has been a PHENOMENAL contributor during the year, and now has a stash of great cards to send without any stress!  WTG, Jamie!

CONGRATULATIONS

Jamie from JPScraps!


Your prize package is in the mail!


Your comments are treasured!


Wednesday, October 24, 2012

Cookin' with Mom!


My parents were here visiting for a few days, and of course, Mom and I had to get into the kitchen to do a little cooking.

My husband LOVES LOVES LOVES coconut cream pie, and though I'm quite a good cook, I've never made one.  I thought this would be the time to get one made.

I found 3 recipes, and after some discussion, we made the one out of the Taste of Home Baking cookbook.  I added more coconut in the custard base and topping the meringue than the recipe called for - because I knew Bennie would love that.

It turned out GREAT!!

Good quality time with Mom in the kitchen, and we all had some fantastic pie.

Winner, Winner, Coconut Pie after Dinner!

LOL  Sorry, couldn't resist.


Your comments are treasured!

I'm Having a Real Problem!

Well, maybe not a REAL problem, but it sure is a frustrating dilemma.....

I thought that by doing my 2012 Christmas Card Challenge I'd be all set by this time of the year with Christmas cards - and I am!!  I can expand my list this year, and give some really nice cards out.

My problem?  As I look around on different websites, I see all these AWESOME card designs.  I want to make them all!

This time of year, I need to start seriously cutting on my Cricut to get the calendar pieces ready, and I still want to make more Christmas cards!

What a dilemma!

I might just have to pick and choose and set more interesting challenges next year.

Hope you all have a FANTASTIC day!


Your comments are treasured.


Sunday, October 14, 2012

50 Christmas Card Order - COMPLETE!

My dear friend (and boss) of the 2nd job I work at ordered 50 Christmas cards late in July, beginning of September.

I had some samples laying around because I've been making so MANY Christmas cards this year!  I wasn't able to stop just at the Christmas Card Challenges because I'd seen so many really amazing cards, and wanted to play with some new techniques.

We decided on 4 different designs, and one sight-unseen (which I think turned out the best)...  With just a few little details and delivery to complete next week or the week after, my project is finished.  WHEW! :)

 Many of the cards use the Triple-Time Stamping technique, some old stamp sets, and some very new ones.
I think I'll call the next series of two pictures Triple-Doubles - Triple-Time Stamping, with a Two-Step Stamping set.  Whew!
 The picture directly above and below feature the new stamp set for the season: Watercolor Winter.  I REALLY love it!!!  It's a two-step stamping set, so I ordered them in wood mount, and made a permanent Stamp-a-ma-jig template for the outline pieces.  You wouldn't believe how much time this saves!!!

 These 3 cards feature one of my very favorite stamp sets: Bells and Boughs.  I get lots of use out of it!  There are quite a few of these, and they took an incredible amount of time coloring with markers.
These cards feature the Joy-Fold technique, and once all the pieces are cut, go together very quickly.  I used the new ornament stamps and coordinating dies as well as some Be Of Good Cheer Design Series Paper to make these colors work together so well.


 The above card showing the inside view is the last set of 10 cards to complete the order... and are stunning in person.  All the materials here are from last year's Christmas catalog - even the velvet ribbon.  I used embossed vellum to cover the star, and pearls to cover the glue dots.  LOVE the Stampin' Up glitter paper!  It is amazing in person!

Stamp sets used for this card order:  Christmas Collage, Bells and Boughs, Christmas Postcard, The Sounding Joy, Many Merry Messages, Watercolor Winter, and Watercolor Winter.

Your comments are treasured!

Spectrum Noir Holiday Part 2

Here is my second submission for the Spectrum Noir Challenge - Holidays.

After making the purchase of the alcohol markers, I realized I don't have that many images with which to use them!  Don't mistake me... I'll find lots of ways to use them - they're FANTASTIC!..  It just gives me a chance to be a little more creative.

So, Here is my submission for the Holiday Challenge:


Stampin' Up products I used for this card:  Riding Hood Red Cardstock, Whisper White cardstock, Black and Riding Hood Red ink, gold cord, and the lace doily sizzlits die.  The stamp "Merry Christmas" came from Hobby Lobby.  The Santa Stamp is from a CTMH set - very vintage Christmas!

Spectrum Noir markers used:

FS2, FS3, and PP3 for Santa's face,
CG1, CG2, and DG2 for the Ivy, with bare touches of DG4 for depth.
Santa's outfit and Holly Berries are colored in DR1, DR2, and accented in DR7
Santa's Beard is highlighted in IG1, IG2, and IG4
The ornaments on his jacket and in the wreath are GB5 and OR1.
The blue background is colored with TB1 and TB3 flicks.
DG3 and DG4 are used to highlight the cord outlining the oval around Santa.

HERE is a link to the Spectrum Noir Challenge page so you can view all the other submissions.  There are some really amazing pieces of work to see!

Your comments are treasured!

Friday, October 5, 2012

2012 Christmas Card Challenge - October!


Well, here we are, it's already October 5th!  Halloween is coming quickly, temperatures are cooling off, or at least I think they should be!  Don't forget that Thanksgiving is right around the corner, and of course, Christmas is coming!! :)

I'm so curious to hear how everyone celebrates Halloween!  We don't do that much.  I buy lots of bags of candy, and we've started setting up the card table and sitting out in the driveway to watch all the little kids and big kids alike coming down the street.  I'll carve pumpkins using the Pumpkin Masters, so it's nice to hear everyone OOOOooh and AAAAAh over them. :)

Alright, here we go!!

The theme for October's Christmas Card Challenge is:  Christmas Lights!

In any way, shape, or form, you must put some type of Christmas lights on your card - Mine are Kitchen Sink stamps.  There are 3D lights, Cricut cut lights on the Christmas Cheer cartridge, stickers, etc.  So many Christmas Tree Lights! :)

As always, there are the basic rules, 6 cards all based on the given theme, and posted here by midnight on the 20th of October, CST.

HERE is a link to the original post with the rules.  Really, very simple and straightforward!

Just can't wait to see what you've come up with!!  Put mine to shame for sure.


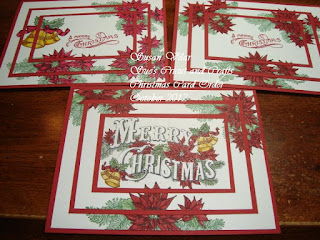
 My cards are a version of the One Sheet Wonders, stamped with Kitchen Sink stamps.  I went CRAZY over these when I first saw them...  Just HAD to have 'em, and I use them very often.
HERE is a link to the stamping tutorial I wrote with photos at each step of the way to show how these awesome lights are made.

I used some of the new Stampin' Up products - the Punch Pack, the die cut edges, the embossing folder that compliments it, and one of the new Christmas Stamp sets.

I was planning on adding some ribbon, but started gluing, and when I was finished, I realized it!  Big OOPS there! :)

Click on the link, and enter your cards below!!!


Your comments are always appreciated!
 ~*~ ~*~ ~*~ *~ ~*~ ~*~ ~*~ ~*~ ~*~ ~*~ ~*~ ~*~ ~*~ ~*~ ~*~
A Proud member of The Lime Light. Click on over to see what we are doing.

Wednesday, October 3, 2012

Our Chinese Visitors!

 This is a very exciting week at my Elementary School!  We are having our yearly visit with our sister school in China's visitors return!

Last year was my first experience with this AWESOME project our school takes part in.  One of our sponsoring teachers asked me to make something for the visitors to remember their visit to our school.  She's been so kind to order gifts and projects from me before, we went through our usual discussion and idea session, and came up with this.

I used green cardstock for Oklahoma, since we live in what they call "Green Country" though it's been pretty brown this year with the drought!

I lucked out that the Hello Kitty cart had a nice Friends cut, and the other letters were cut and adhered individually.  Oklahoma, the names, and the dragon all have gold Stickles accents.  Each person chose an English name to use.  With the exception of one teacher, and two girls that chose Angel; I added their given names to differentiate the booklets so they wouldn't get mixed up.

There will be 15 visitors in all for the week, 10 kids and 5 teachers.  The assembly on Friday will be GREAT!  We had lots of interesting things to see, a gift exchange between the schools, and I got to see a Native American dance in person.  What an experience that was!  In early May, we send students and teachers over to China for a week to 10 day trip.


 Here's one of the booklets close up.... and if I could figure out how to rotate the pictures with this new interface, it would be in portrait format! 

I am thrilled to know that some of my work will go to China....  so exciting!  I hope they like and appreciate their books.


Your comments are treasured!