Showing posts with label SU Stamps-Scent-sational Seasons. Show all posts

Friday, July 24, 2015

Christmas in July - July 24, 2015


 This has to be one of my very favorite cards!  I've made this before.  It uses my favorite DSP Be of Good Cheer (ret.) and has so many fun images!
This card isn't difficult at all to make, it just looks like it!  I tell people that the card really are easy - but I understand it surely doesn't look that way for all the details!


 photo enjoybermudabay.jpg

Thursday, July 24, 2014

Christmas in July - July 24, 2014


Here's another more detailed card for today's Christmas in July celebration.
 I really like the Tri-shutter card design.  It's not all that complicated for a seasoned card-maker, though maybe a little challenging for someone just starting out.  I first made one of these a year or so into my card making only because that's when I discovered the tutorial. 
 For this card, I used a base of the Gumball Green,  the retired Be of Good Cheer DSP, and lots of other details.  The mitten punch, Scent-sational Seasons stamp (gingerbread man) and die set,  one of the SU ornaments, and one of my favorite stamp sets... Jolly Bingo Bits!

I've had lots of fun with my Stickles the last two days... lots of little touches here and there.  Red and Green buttons on the gingerbread men, holly berries on the wreath, yellow to accent the star.  I also added rhinestones on the ornament, and as holly berries.

One thing about these, every time I make one it never seems to come together well until the end.  I'm thrilled with how this one turned out!

Click HERE to find a tutorial on how to make the Tri-Shutter Card.  No, it's not difficult, it just takes some time and patience.


 photo enjoybermudabay.jpg

Christmas in July - July 23, 2014


 OOPS!  I meant to get this card up for yesterday, but I've been very busy getting ready for this coming school year - starting out with a full classroom and all after years working peripherally - it's been a hectic summer!  That's my excuse, and I'm sticking to it!!  :)

 Today's card is a tri-fold card.  Not difficult to make, just a little time consuming, but SO worth it!

This card does fit into a regular A2 envelope, even though it doesn't look like it will.
I punched and die cut a lot more gingerbread men than I needed for this card, so you're going to see them pop up in the next few days! :)

I used the Gumball Green Coordinations cardstock  as a base, and embossed the front and back panels and sanded them to take advantage of the effect of this paper.  I didn't emboss the center panel so I could use it for the greeting, and it would be hidden when the card was closed.

Click HERE for a tutorial on how to make the cuts for this very cute, relatively simple card.


 photo enjoybermudabay.jpg

Tuesday, November 5, 2013

2013 Christmas Cards - November

Wow!  We made it to another November!  This is the last month in the Christmas Card making for the year since at the end of November we have to get them signed, addressed, and sent out to arrive at the beginning of December (or at least the 2nd week of December).

I wanted to center my design around the sentiment this month, and once I started playing with ideas, it got to be a much more detailed (though not difficult) card by the time I was finished.

I started with the Merry Christmas at the top, and used the striped embossing folder for the bottom half and covered the edge with the Cherry Cobbler seam binding and a bow to show off the mug.

Then I stamped and die cut the mug in Smoky Slate,  the candy cane in Cherry Cobbler, and the gingerbread man in Chocolate Chip.  I colored the rhinestones on the mug with a blue Sharpie and added pearls on the gingerbread man's buttons.

 Here's a shot of all three:  the front, the sentiment, and the stamped envelope.

I hope you've enjoyed all my Christmas cards this year.  Since I changed the rules to include the stamped sentiment on the inside and the stamped envelopes, I'm so much further ahead of where I was last year!  It will be so easy to include a note, and signature to finish each of them quickly at this point, and sent out some really beautiful Christmas Cards!

Last year (2012) with all the challenges and extra cards I made, I had 72 to send out to friends and family.  This year since I made one card for each day of July, I have 112 cards in total to send!  My list has expanded, and I have more co-workers this year as well so having the extra 40 cards will definitely be a good thing.

Please enjoy!


Monday, July 1, 2013

Christmas in July 1

Ahhhh July!  The craft stores started putting out the Christmas decorations in late June, and that just makes me HAPPY HAPPY HAPPY!!!

This is my card for July 1st, Christmas in July.

I used 4 stamp sets:  Scentsational Season, Merry Minis, More Merry Messages, and Joyous Celebrations.  Cardstock:  Cherry Cobbler, and Gumball Green.  DSP:  Festival of Prints  Ink:  Chocolate Chip, Gumball Green, Cherry Cobbler, and Daffodil Delight.


This is actually a card I saw last year, and made with some of my 'therapy' kids for their families.  One of my boys made 6 of these - we went into 'production' for 2 days! :)  It really helps to show them patience, perseverance, and planning.... as well as design and placement.  I always have a final design in mind, but if they want to take it somewhere else, it usually works out pretty well!

I loved this card the first time I saw it.... and starting this little projectito - I thought this was quite an appropriate way to begin.

Please enjoy!


Friday, April 5, 2013

2013 Christmas Card Challenge - April!


April!  Has Spring arrived or is Old Man Winter hanging on where you are?  We've got a mix - 80° one day, 30° the next - snow predicted, but the daffodils are blooming, and my grape hyacinths are up in the flower bed in front of the house.  Who knows what's next?  Spring?  I hope so - Christmas might be my favorite holiday, but Spring is my favorite season.

Let me jump right into the theme for April:  Christmas Icons!

Sounds strange, doesn't it, but when I searched online - there were thousands of images!  Then I really started getting ideas!  Put it this way... I didn't make 6 cards this month. ;)

SO, just for inspiration, I have some of the images I found online.  Here they are:


Alright - on to my samples for April's challenge.  I mentioned that I didn't just make 6 cards this month, I actually ended up with 20, or I should say I STOPPED at 20!

We didn't travel this year for Spring Break, so I had the whole week to play in my craft room in addition to some other things I wanted to get accomplished.

OK, for my first 6 cards - a Christmas Door - what's more iconic to Christmas than a door with a wreath on it?  We made these at a Stamp-A-Stack this past November, and I really loved 'em!  Isn't that antique brad doorknob cute?  I used 2 different brads.


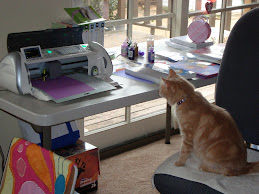
 The wreath was made with the 'new' 1 1/4" scallop punch and a 3/4 inch scallop punch from some of my green scraps.  Gotta LOVE using scraps when you can! Above you can see my craft table.  NO, it's never clean - I just can't work in clean.  It isn't possible. ;)

For the next set of 6 cards, I got out my Jolly Bingo Bits stamp set and had to choose!  There are 24 in all, and in a moment you'll see how I incorporated a few others for the inside and envelope.  They make wonderful Inchies!  I also added some rhinestones and Stickles to add some interest.

 Click HERE for a link on how to make these awesome, easy, quick bows!

 Here you've got the envelope and inside view of these mini-icon cards.
"No naked envelopes" is a quote I heard from Shelli Gardener at the Regional in Dallas last month - It resonates - 'naked envelops' - LOL


Here is the last set - I actually made 8 of these in total 2 of each design, and one red and one green for each icon.
These are a shameful CASE from another Stampin' Up Demo with some of my own touches added.  I remember clearly when I first saw them.    Enjoy!


 Yes, the gingerbread men, trees, cocoa cups, and candy canes hold the card fronts together!
Below is a picture of the inside - I made an extra die cut from the original cardstock for the backing to give it extra strength.

 Here are the envelopes - giving just a little hint of what's inside.


Please leave a comment. Thanks so much!


Wednesday, September 5, 2012

2012 Christmas Card Challenge - September!!


 Labor Day has just passed, and here we are, most of us are back in school already, and some are just starting up the school year 2012-2013.  Hopefully your year is GREAT!

The Christmas Card Challenge Theme for September is:  SHAPE Cards!

I thought of making it a Christmas Tree Shaped card, BUT there are so many awesome Christmas shapes out there, why limit your imagination!!??  Trees, Stockings, Gingerbread Men, Lights, Ornaments, OH I could got on FOREVER! :)

HERE is a link to the original post with all the rules.  

In short, make 6 cards based on the theme, link them here using the Linky at the bottom of the post by midnight on the 20th and get your friends and family to vote for your card creations!  Winners are announced on the 25th of the month, and I send out a prize package for your time and effort in participating.

Here are my shape cards for the month, with a link to a video tutorial on how to make them.


HERE is a link to the video from a Stampin' Up Demo, Melissa Stout who first posted this.  I watched it and LOVED it!  As you can see, my cards are a little different, but that's the fun!  CASE it, and make it your own.

As you can see, my cards are a little different from the video.  I forgot the peppermint candy, but will add it before I send them out.
I used DCWV patterened paper from one of their Christmas Stacks, and used Martha Stewart border punches in addition to my Stampin' Up punches.  The star was made with the new punch pack, and coordinating stamp set.

I hope you like the cards this month, I like them even more in person than on the video, and I LOVE that video!  Melissa did a fantastic job!

Remember to get your card creations entered in the Linky on/before September 20th at midnight, CST!


Your comments are always appreciated!

~*~ ~*~ ~*~ *~ ~*~ ~*~ ~*~ ~*~ ~*~ ~*~ ~*~ ~*~ ~*~ ~*~ ~*~
A Proud member of The Lime Light. Click on over to see what we are doing.