Thursday, June 27, 2013

June Stamp Club Cards

Our May club was interrupted - and the first card was one I made this month instead of the June 1st event.


It was actually pretty quick to put together, and I had some help with the bows from my friend Robin. :)  She and Kathy have a talent for those little bows.
LOVE the Versamark effect on the background.  


 The Stampin' Up 2013-2014 catalog has hexagon stamps and punch available...  They look so awesome and are so versatile!  For this card, I thought there was a special trimmed background... but no!  It's the edges of the stamps making the nice border....  :)


 This little project has a BIG impact!  It's SO SO cute!  I made a purple one - we had a choice of purple, blue, and orange.  Everyone's looked different because of the patterned paper and they all looked so fantastic! 

It took time and a little know-how - but turned out really awesome looking!  In hind-sight, I should have taken a pic of everyone's circle box.  :)

Here's a color-corrected picture showing a side view.  It's a cute little trinket type holder... just perfect for little treasures!


Can't wait to see what's next.


Friday, June 21, 2013

Birthday and Anniversary - Belated

We just spent about 10 days in Wisconsin with family.  It was great seeing everyone, and getting together for so many celebrations.

Unfortunately, two of them got completely away from me.... and I thought I prepared so well. :(

What did we celebrate?  1.  youngest nephew's high school graduation 2.  Mom and Dad's 50th Anniversary  3.  Our 11th Anniversary 4.  Father's Day and yes, there were some others in there I've already forgotten!  One of those senior moments, I guess.

BUT I forgot my oldest nephew's wife's birthday!  We were actually in Door County for it too....  but I hadn't prepared a card... so as soon as we got home, I made this for her.


I don't use this stamp set much called "Feel Goods".  It's so appropriate for Alex's personality!  She certainly brings sunshine and smiles!!!

AND Nick (my nephew) and Alex's Anniversary is just 5 days after ours!  Since we just returned from our trip, I made this up for them. 

I actually used to have terrible trouble with the Large Paper Doily die-but late the other night an idea came to me and it cut so much easier, and with much less hassle than I've had before.
I had the pearl swirls from a Hobby Lobby purchase that was just waiting for the right card.

Out on the internet is a little wood device called the 10 second bow maker.  I sent my Dad the little video so he could see it, and asked him to make one for me.  The organza bow was made with my little perfect bow maker.

Just one more little thing.  I'm interested in seeing how these pictures post... and the quality.  I just got my FIRST Smartphone, and used it to take the pictures.  Will have to see how it looks!!!


Again, Happy Birthday Alex, and Happy Anniversary Nick and Alex!!!
Aunt Sue


Christmas in July is Coming!


Christmas Is Coming!!!


So if you don't know this by now, I LOVE LOVE LOVE Christmas trees!  So so much.  Is it because they are so beautiful when lit and decorated?  Is it because the symbolize the meaning of the season?  Is it because of wonderful childhood memories?

I don't know....  I just know I love 'em!

I'll tell you a secret - the ceramic tree from my grandmother is STILL on our sideboard.  Yes... I haven't put it away, and I probably won't.  It just makes me happy to see it, and reminds me of Christmas at Grandma's house.  Plus, I don't have a storage solution I'm happy with to make sure it doesn't get broken.

The other Christmas things are put away, but the tree is still there....  so pretty! 

SO... last year I did a pretty good spread on Christmas in July (I think), and my goal this year is to surpass it.

The regular Christmas Card Challenge will post on the 5th as usual, but I have some other things planned.

Stay tuned!


Sunday, June 16, 2013

Father's Day Card


Who knew Father's Day cards would be such a dilemma!  Whew!  There are lots of great masculine cards out there, but I've already used lots of the ideas, and don't want to repeat any.  That's the problem!

I already used the old car in the weeds,  the grill, the shirt and tie....  now what!?
Plus, after retirement, my dad started making personalized cards on the computer with photos and things, so when I present him something he looks for the stamp I use on my creations... and then I get a grunt of approval.  Pressure!!??!!  :)

After spending quite a bit of time thinking, I remembered one of my Cricut carts has tools!  It just so happens that Dad is GREAT with tools and builds all kinds of great stuff... so this is the card I came up with for him this year.


I used lots of dimensionals to raise everything off the page... and used white and silver pens for accents.  The background is a piece of Crumb Cake cardstock embossed with the steel plate folder.


I hope he likes it! :)


Friday, June 14, 2013

A Bookmark for Me!


Most of the time I make cards and projects for other people.  That's actually 99.9% of the craft work I produce.

I was looking around online and saw these handmade bookmarks - I made some in plastic coverings a few Christmases ago... but never made one for myself. 
 Lately, I've been spending lots of time waiting......  and I can nap only so much. ;) ;)... SO I started picking up books and novels to read while I've been doing this waiting.    The only problem I've had is that I'm using bits of paper, book receipts from the purchase, or adverts I've torn out of the center as bookmarks!

After I saw one of these online, I decided to make one myself. :)  The backing is Wild Wasabi,  DSP mini polka-dot paper, and 2 1/2 by 8 inch piece of whisper white, with 1/4 inch added to the dimensions of each of the backing pieces.
The ribbon was a scrap that was just long enough not to go to waste.  Whew! :)

Colors:  Pink Pirouette and Blushing Bride for the small flowers.  Melon Mambo and Rich Razzleberry on the top flower,  Daffodil Delight and Crushed Curry for the bottom flower.  The leaves?  Pear Pizzazz and Wild Wasabi.
I then took these colors in the markers, and wrote READ all over the front.

Talk to you soon!!


Wednesday, June 12, 2013

Thank You Card


I called my husband's boss the other day to ask if I could bring someone special to the office for a tour.

He was wonderful, and gracious and even gave the little boy a speech about the importance of the work their office does.

This is the card I made for him as a Thank You.


I hope he likes it.  :)

This is an off-shoot of the card we made for Valentine's Day....  so many different ways to make it!

**Where did I get the red white and blue cord?  It's a tassel cord!


Sunday, June 9, 2013

Graduation Card

My youngest nephew is graduating from high school this weekend.  Among other things from us, he will receive this card.

Our high school colors are purple and white...  I've always loved those colors together!  I had good fun with all the gradients in this card.

 I used the stamp set "Blue Ribbon"... and lots of layers!  Concord Crush is the dark purple, and Wisteria Wonder is the lighter tone.  I also used a stamp-off to stamp the Congrats Grad all over the front, and Wisteria Wonder for the inside of the card.  Little stamp crazy??  Yes! :)  I still think it looks pretty good.


LOVE LOVE LOVE that Congratulations stamp.  It's got to be one of my most used stamps.

I also made a gift card holder - will post a picture of it later - so awesome in purples and whites!  It was one of our June 1st projects from my stamp club.


So many projects.... so little time!  :)


Wednesday, June 5, 2013

2013 Christmas Card Challenge - June 2013!

Summer is almost upon us - Spring storms all around with rain, lightning, thunder, and tornadoes.  Yes, we're right smack-dab in the middle of Tornado Alley.  Shelter-in-Place plan, work plan, out and about plan....  trying to be prepared, but always with a tinge of worry.    Oh well.  Spring still is my favorite season.  With all the rain we've had, things are beautiful, green, flowers blooming...  so much better than the drought! :)


SO.   After all that, the Christmas Card Challenge for June!


Click HERE for the complete list of rules and regs. (They're easy, I promise!) in order to compete in the challenge.  The best part of competing in my challenges?  Your Christmas cards will be all completed, hand-made (not rushed) and ready to send out right after Thanksgiving.  What a great way to give hand-made cards and not feel that extra pressure at the holiday!


The theme for June's challenge is:    Try a New Technique


This has to be something you've never done before - paper tole, tri-fold cards, shaving cream technique, alcohol ink backgrounds,  Oh! there are hundreds!  "Your imagination is your limitation."   Here's your chance to try something you've never done before.

Mine?  I've never given the Black Magic Technique a try and really wanted to. You Tube is a wonderful resource as is Splitcoast Stampers.  I personally like the videos so I can actually see what they're doing.  Helps me remember better. :)


Here you can see 3 of the 7 cards I made this month... so you could get a good close-up of some of my favorites.

I used the Stampin' Up 2-step stamping set called Watercolor Winter for these cards.  It might be retired, but it's so awesome for so many different things.  This isn't the first time I've used it.
 1st step to the Black Magic Technique is to stamp the image on black cardstock in white craft ink.  Use the heat gun to dry the craft ink.
 2nd step to the Black Magic Technique:  (This one takes the longest.)  Use watercolor pencils and color in the images over the white craft ink.  I used different shading with the reds.  They show better in person, as always.
 Since this is a 2-step stamping set, I then took the top image on each card, stamped in white craft ink again, and left it white for some extra definition.  The Merry Christmas is stamped with Versamark ink, covered with white embossing powder, and heat embossed with the same 'gun'.


Here you can see all 7 of the black magic cards (I made the Holly and Berries as a bonus card to see what it would look like.)  with one showing the completed inside, and one of the envelopes.  "No naked envelopes!"

 Basic rules:  Create 6 cards in a new technique you've never tried before.  Finish the insides and stamp the envelopes.  Take a picture or a few - enter them here before midnight the 20th of June to be considered in the voting.


Monday, June 3, 2013

June 1st New Catalog Event!

This post has LOTS of pictures!!!  Click on the pic to get a better view.

Our upline, Kathy Douglas runs our Stamp Club once a month, and another club that meets every other month, as well as these events.  New Catalog Events, Christmas Events, Stamp Camp in October.  She always has some awesome projects to make!

Sometimes I'll join her with our other Demonstrator Robin Smith to put these events together.  This time because of time constraints, I helped with the food and supplies if they needed something.  I also took my camera!  I'm so glad I did!

Here are just some of the pictures.

Lorraine (l) Kay walking past, and Dee (r) making a Mosaic card.


We get to see Lorraine at Events.  She's always fun to talk with and craft with.

Dolores just recently joined our Club and had on the cutest top - lace and beaded fringe. 
In the center you see Robin with Donna (l) and Kay (r) giving a tutorial on her flower making.  We did one of these flowers at Stampin' Up Regional in February but she's been making these for a LONG time! 

The next 7 pictures are some of the flowers Robin's been working on.  They were so cute, and she has some awesome ideas!  Enjoy!!


Washi tape works GREAT on the rosettes too!


Do you see the Pool Party gingham on the rosette in the back?  Stamp it with the new wheel, score, and use adhesive.  AWESOME!!!

Need a gift bag?  Decorate and add a paper flower.  Any color you need!!

I really LOVE this idea! What a great way to showcase pictures.  Customize to the background, outfit, occasion....  GREAT idea, Robin!!
 Next couple of pictures everyone's focused and concentrating!  We were there from about 10 a.m. to about 3.  Everyone worked at a pretty leisurely pace and got lots of cards completed.


Here are a few of the cards I made.  We chose 9 cards... and I made some duplicates.  There were also designs I didn't choose.  
 When I got home, I fixed my tablecloth background... looks MUCH better than what I had to start with!  LOVE the Strawberry Slush ink and technique to make the watermelon slices. :)

 These two cards show Robin's paper flowers.  I also added a bow and the pull tab on the white sheet.  The Wisteria Wonder is slowly growing on me.  SLOWLY!

Pool Party cardstock, Pool Party DSP, and the new Label punch to make this gift card holder.

Pennant card using some of the new In-color colors - Crisp Cantaloupe and Pistachio Pudding.  There was also a version of this card with Baked Brown Sugar and Coastal Cabana - so cute!!!  The Baked Brown Sugar really goes with everything!!

Kathy had these all prepared for us when we arrived - along with the directions!  YAY Kathy!  They looked pretty cool all lined up the table.  


It's always so much fun when we get together...  Crafting, Lunch, More Crafting....  Perfect Day!!


Sunday, June 2, 2013

Witchy Poo Pics Selection of 2010 to 2012

Yesterday, while at our latest New Catalog Stamp Event, I had a request from two of the girls to show more pictures of Witchy Poo (Poopie) here....  they thought he was under represented.. SO, here goes! :)

This a pic from the day I got Witchy Poo from Sandra's niece - Hankie is used to seeing new kitties around, but he doesn't always like it!  I love this picture!  Shows such a difference between a 6 week old kitten, and an 11 year old Hankie!


Here's the other kitty Sandy getting introduced to Witchy Poo for the first time...  Sandy ran away from him for the first week!  It was pretty funny.  He's such a scaredy cat!

This pic shows how teeny-tiny he was!!  Just fit in the palm of my hand. 

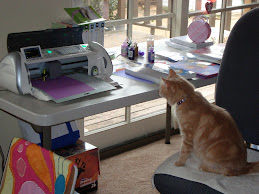
Since I spend so much time in my craft room, I introduced the new baby to my work desk.  He still likes to explore and isn't too hard on my crafts, but every once in awhile, I find a stray sponge on the floor....  guess he found a toy. :) 
This pic is from our first Christmas putting up the tree.  He was 2 at this time... and as far as we know, he didn't climb in the tree.  You can see the other two sitting under the tree - he likes to join them too... all kitties under the tree!

This is one of Poopie's favorite perches - loves to sit on top of my paper rack!  He's pretty good at NOT knocking things off.... which is a little surprising.

Here they are.... 3 kitties hangin' out - and my husband's feet too! 
Sometimes, Sandy and Poopie will share the top perch on the kitty tower.  Sometimes.  The box of Kleenex was put up there to discourage him from perching there.  It works sometimes. :)
This is one of his favorite perches - on the back of my recliner.  Have to watch out though... he gets out that whippy tail, and will smack you HARD upside the head!  That's not so much fun! :)

Witchy Poo - quite a study in contrasts this kitty is... he's just about to turn 3.  He's so sweet and affectionate and loves to cuddle... BUT he'll chase the other two relentlessly and sometimes we find tufts of fur on the carpet from some of their "play" encounters. 

He also wags his tail like a dog!  It's really unusual, and freaks out my friend Dee a little - most kitties are angry when they wag their tails as a sign to leave them alone, but he does it when he's happy!  He doesn't growl much, and makes all kinds of cute meow-y noises.

My husband says he's too smart for his own good, and we are sure he's smarter than my other two kitties.

OK Sandra and Robin!!  Here are some Poopie pictures!!  Leave a comment or two! :) :)

Talk to you soon.