Showing posts with label Stampin Up. Show all posts

Friday, June 12, 2020

Frame for Mom

We'll be home to visit soon, and in addition to the many crafty things I've made recently, I made this for Mom.
The Happy Birthday in the center is from Stampin' Up!  It's a retired die I still use very often.  The rose sprays are from Crafter's Companion.


Here you can really see the dimension from the decoupage pieces.  I used some Tattered Angels glitter spray and sequins to fill in some blank spaces and add some sparkle.

Wednesday, March 15, 2017

Aunt's Birthday Card

I've posted cards made with this stamp and die cut set before.  I think this one has to be my favorite!  It's very possible that practice makes progress in this case. 

 I used thick white cardstock to die cut the oval piece.  It gives it more stability than regular white cardstock.
 This design gives lots of space on the back to add dimensionals to pop the design off the embossed design on the card base.
I used Stampin' Up ink colors:  Pool party and Daffodil Delight.  I used Stampin' Up! Watercolor pencils Bermuda Bay, and cardstock colors Pool Party, and Melon Mambo.  I also used two of my alcohol markers from Spectrum Noir to color in the balloons.

Wishing my Aunt a VERY Happy Birthday!

Sunday, January 1, 2017

2017 Annual Calendar Project January - March

Here they are!  I know - I posted them in descending order - BUT with a purpose!  In the past, I posted the calendar's in order, and when you scroll through, the months are out of order!  By posting October - December first, they actually end up in correct order when all the pages post!  Whew!

Here they are all now in proper order. 
 Last year I used this melted snowman on Christmas cards, and received my very first one the Christmas before it from my niece who also makes cards!  It's been a favorite every since.  I used the stamp set Invisible Snowman from Kitchen Sink Stamps.  They're fantastic...  GREAT quality stamps!

 The vertical hearts have appeared on many calendars, and will continue on every February as long as I make these calendars.  I really LOVE this vertical hearts cut!

March contains many different elements.  An Irish blessing stamp I picked up on our travels many years ago; a shamrock stamp I've had for many years, and the Cricut shamrocks border cut. 

2017 Annual Calendar Project July - September

Here are three more of the calendars.

The backgrounds measure 4 1/4 inch by 7 1/4 inch.  I ordered cases from a website called calendar-case.com (or something like that)  These calendar pieces fit the landscape design. 
 As always, July MUST have fireworks!  I also got out a favorite stamp; God Bless America.  I used the new watercolor pencils on it - SO pretty!
 I had more hot air balloons stamped and cut to add to the August page and didn't.  Looking at it more and more, I feel I should have added those other balloons. 
THIS is one of my very favorite designs this year!  I LOVED it when I first saw it on Pinterest a year or two (or more) ago!  It uses gorgeous grunge, and the stamp set Gently Falling.  YES, I fussy cut each of the leaves - the other leaf dies I have were too big!  

Saturday, July 16, 2016

Baptism Gift for my Great Nephew

Over the past few years I've made many of these.  MANY.  This was a Stamp Camp project 3 or 4 years ago from my upline Kathy.  I made one of these for family members...  I even sent one to Panama with my husband for his Dad, so they've gone international! 

I went through my Lutheran Hymnal and found a great baptismal hymn to use as the background.  The Canvas backing is painted with acrylic paint as are the edges of the two wood crosses.


They are both covered in some retired Stampin' Up! DSP.  The pattern on the larger cross in the back has some flocking on it to give some texture.

I tea-stained the hymn, and used Mod Podge to adhere it to the backing, and cover it to protect it.  If you haven't heard of E6000 (E six thousand)... take a look at it - it's some SERIOUS adhesive! 

My husband also helped me pick out the cross embellishment.  There were probably 6 to choose from, and this was by far the best choice.


Wednesday, July 13, 2016

NOT a Pinterest Idea, but My Own! Nursery Decor

A little over a month ago, my great nephew (my FIRST great nephew) was born!  I'm now a Great Aunt.  Can't quite get my head around it yet, but I will soon enough.

The theme of his nursery is "Under the Sea".  An earlier blog post shows the shower invitations I made for the Baby Shower my sister hostessed.  It was a great success, and I heard there were great comments about the invitations. :)

 SO... with all the time I spend surfing Pinterest... and it's lots of time on Pinterest....  I came up with this idea.
The big F is from Hobby Lobby. It's about a foot and a half tall.  I used acrylic paint in Harbor Bay Blue, and swirled some white into it while it was still wet.
I used the Best of Pixar Cart to make these characters...  I cut Nemo and Squirt at 3 inches, and Dory at 4 inches.
I did some marker work on the figures to give them dimension.
You can see the F (for Felix) hanging on the wall of my craft room.  I'll try to get a picture of it in its spot in the nursery.


Sunday, June 19, 2016

Cricut Crafts Stay Here, Stampin' Up! Projects Moving!!

Good Afternoon!!

This decision has been creeping up on me slowly over the last 6 months.

I have a Cricut and Crafts Blog where I mostly post my Stampin' Creations, and my Cricut Creations get little attention.

Though I'm stamping more now than Cricut-ing....  I'm going to leave this blog live solely for my Cricut and Crafts, and move my Stampin' Up! projects over to my newly created blog.

https://susanvilarstamps.blogspot.com/

Please continue to visit Sue's Cricut and Crafts to see my Cricut projects, and all my Stampin' Up! projects will go live tomorrow on the new blog.

Save it to your favorites or bookmarks!

Thank!!!

Thursday, June 16, 2016

New Catalog (2016 - 2017) Event Samples 5


A shaker card, and a lesson on not making my same mistakes.

SO, HOW do you make a shaker card?  Steps and pieces.  First, do as I say, and not as I did here.   You can see my mistakes - I'll point them out.

First, stamp your top piece.  I put the dimensionals on before I stamped my spots, and you can see the edges of the stamp on both sides of the easel.  DO NOT stamp last!  Stamp first!!  :)  Learn from my mistake!
NEXT, make sure when you use your Stamp-a-ma-jig, you have your sentiment lined up straight using your grid paper.  Mine is a little skewed to the side. :(
THEN, make sure you adhere the window sheet right to the cardstock BEFORE you place the adhesive dimensional strips!....  This is actually my second top piece... I had to throw the first one out. :(  Darn it.
SHEESH!  It's a wonder I even got this card finished with all the mistakes I made.  It did turn out pretty well though!

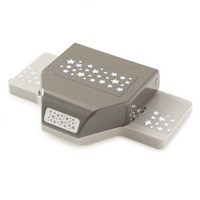
The confetti pieces come from some punching Mom and I did for the calendars, and I kept them in one of the Stampin' Up containers for trinkets and buttons and such.

Don't get me wrong - I do love the shaker cards... they do take some engineering and thought.

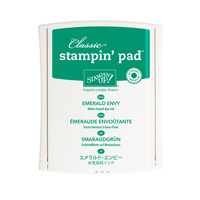
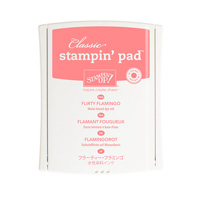
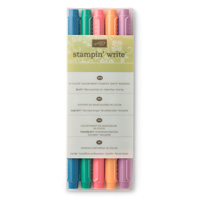
I haven't mentioned this before, but Stampin' Up has high quality cardstock, ink, ribbon, and tools to help you along your crafting way!  Even before I became a demonstrator, I used the ink almost exclusively just because of the quality.   Contact me to give these high quality coordinating products a chance!

Thursday, June 2, 2016

Stampin' Up! New Color Samples

Here I'm presenting a set of 4 cards using the same new In-Colors, Hostess stamp set, and DSP (Designer Series Paper).  The difference on each card is the background cardstock.  Each flower image is stamped on Very Vanilla to match the DSP Painter's Palette.

I have another sample coming up in the next week or so showcasing the 5th new In-Color, Dapper Denim.  Stay tuned!

I made these cards quite plain unlike my usual very 'busy' style to showcase the colors.  I always find it really amazing how a background color can make such a difference in a card's design. 

This card's background color is Sweet Sugarplum.

This card's background color is Peekaboo Peach.

This card's background is Emerald Envy.

Here the background is Flirty Flamingo.  On a personal note, I didn't think I'd like this color as much as I do, but as I'm making samples for our big event, I reach for the Flirty Flamingo more than the other colors.

After stamping, I added details to the flowers with the brush side of the Stampin' Markers in the same colors.  If you look closely, you'll see some Wink of Stella detail on the flowers as well.

If you are looking for a Stampin' Up demonstrator or someone to help you along your craft journey with products and assistance with color combinations, contact me!


Tuesday, May 31, 2016

I am TOTALLY Taking Credit for this Discovery!

I have been very busy the last 2 weeks making samples for our New Catalog Event on June 18th.  It's 3 demonstrators and we're previewing the new colors, showing samples of old and new stamp sets, 6 Make-and-Takes, image stamping, door prizes...  it's going to be SPECTACULAR!

I worked on a Card in a Box, and here I'm previewing just a piece to show you a Sprinkles punch idea.

I punched out some pieces of DSP, and they seemed really perfect to work as balloon strings!

SO, that's my brilliant idea.  Use one or two of the Sprinkles punch pieces as balloon strings!  You could even cascade them to make really long curly strings.

Monday, June 8, 2015

Stampin' Up In Colors - 2015 - 2017

Presenting the NEW In-Colors for Stampin' Up for 2015 to 2017.

These are colors we'll use for the next 2 years in DSP and solids.
I used the stamp set Gorgeous Grunge to stamp 3 paint splats with only one inking along the left side of the card.  At the top right, I wrote the color with the SU marker, and stamped "Happy Hello" with the ink pad for a look at the stamp using words, and not a solid image.
I used the Dotted Lace in the same color to show a sample.  It's 1 inch wide, and has some stretch to it. 


 I recently heard the term "Grayge".  It supposed to be a cross between gray and beige in describing this color.  It seems to me it's actually a cross between brown and beige.


 photo enjoybermudabay.jpg