Showing posts with label Stampin Up-Embossing. Show all posts

Saturday, July 29, 2017

Christmas Card - Away in a Manger

I made one very simple card in this design.  I found some wonderful Christmas greetings over at Papertrey Ink.  So many of them have fond memories of childhood for me. 

I embossed the figures in gold embossing powder, and stamped the greeting in Soft Suede.  I also used another bible verse for the inside of this card.

A very simple presentation today, but very meaningful to me personally. 

Friday, July 28, 2017

A Christmas Carol

This is one of my very old Stampin' Up! sets.  It just is one of my favorite Christmas movies - Scrooge from 1971 with Albert Finney. 
 I watercolored both images - the card front, and candle on the inside.  I love the look watercoloring gives.  It doesn't take a long time to do and gives wonderful gradients of color on the image.

The card base and mat are both Stampin' Up! Cherry Cobbler cardstock.
I also added Wink of Stella to give the light some sparkle.


Thursday, July 27, 2017

Christmas in July - Holly Swag Merry Christmas


 I made six cards using this image.  I haven't used it before, but I thought it would be good with the Merry Christmas banners I needed to finish using up... and I knew it would look amazing with some watercolor pencils.
 I took this picture below because the pic above looks muted.  I thought this card needed some sparkle so I got out my pearl Shimmer Mists and sprayed each of the 6 images.  It's not shiny like Wink of Stella or sparkly like rhinestones or Stickles... it gives the paper a glow. 
On another post I talked about options for using this embossing folder.  Here I wanted the bulk of the snow towards the bottom, and little falling flakes towards the top.  How?  Turn the paper in the embossing folder.

I really like the watercoloring effect on this image.   I think next time...a purple ribbon!
Now all 12 banners are finished.  I have a set of circles to use - stay tuned!

Thursday, July 20, 2017

Christmas in July - French Horn in Watercolor


I made 12 of these Merry Christmas banners.  If you've been following my posts all month, you'll see that I used them earlier - BUT they just didn't quite work.  I've been keeping them in a safe place until I found the perfect spot for them!
 Here we go.  I stamped and watercolored the ivy and ribbon then used gold Wink of Stella to color in the french horn.  SO sparkly!
In addition to using the Merry Christmas banner, the card just needed something.  I used my Softly Falling embossing folder and added some snow.

Please enjoy!  I have a few more cards that will pop up here. 

Stop by my Stampin' Up! blog to see a card each day. 
search for: Susan Vilar Stamps!

Follow me to see my daily creations in July, and my other creations during the year.


Wednesday, March 15, 2017

Aunt's Birthday Card

I've posted cards made with this stamp and die cut set before.  I think this one has to be my favorite!  It's very possible that practice makes progress in this case. 

 I used thick white cardstock to die cut the oval piece.  It gives it more stability than regular white cardstock.
 This design gives lots of space on the back to add dimensionals to pop the design off the embossed design on the card base.
I used Stampin' Up ink colors:  Pool party and Daffodil Delight.  I used Stampin' Up! Watercolor pencils Bermuda Bay, and cardstock colors Pool Party, and Melon Mambo.  I also used two of my alcohol markers from Spectrum Noir to color in the balloons.

Wishing my Aunt a VERY Happy Birthday!

Sunday, June 19, 2016

New Catalog (2016-2017) Event Samples 15

MORE you say?  Yes... there are more.

This one is SPECTACULAR!  The photo turned out so well... can you imagine how amazing this is in person?  It's a WOW!

Here I have another wedding card.

This one I'll admit took some time and thought,  **and technique.  Though this isn't difficult, I wouldn't say this is for a novice card maker.
I don't feel this turned out perfectly, but no one but me and maybe a few others would see any mistakes.

Below you can see the materials I used to make this dazzling, sparkly card!!

Saturday, May 14, 2016

Nephew and Niece's Baby Shower

 My sister's oldest son and his wife are expecting their first.

I jumped right up and let them know I wanted to make their shower invitations.  After talking to my sister (who's throwing the shower) her only requirement was to keep them flat for mailing.  "I can do that."
 Here's how the front cover turned out.  LOVE that Wink of Stella - and Stickles!  Their nursery theme is "Under the Sea" - so we're using that for the shower as well.
I used 2 cartridges on this invitation - the 2nd one is a bit of a surprise.... Life's a Beach!  It had all the sea pieces I needed!  I got these out in the mail over a month ago to let Gail get them all written out.
Here's Poopie Investigator!  He was curious - of course - and had to see what was going on.  Thank goodness he's used to my craft work


Monday, May 9, 2016

Additional Teacher Appreciation Gifts!

As you can see from my previous posts, I had a VERY busy crafting weekend!
I really appreciate the support these ladies give me as a classroom teacher, so it's my pleasure to make these things for them.
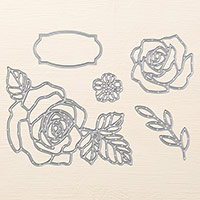
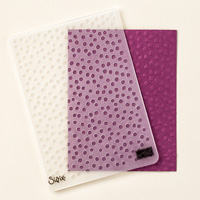
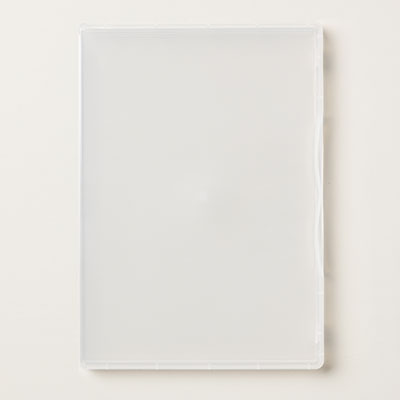
Here you have an altered project - They are the Stampin' Up Clear Stamp cases, made into a personalized notepad holder.

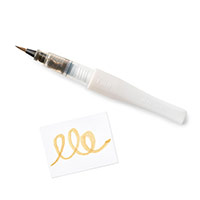
This notepad holder matches the Satchel Purse I made my principal.  You can see the insides below.  I layered each label with 3 punches, and went over the letters with the Wink of Stella brush.  I really LOVE that Wink of Stella!  It sounds so cool, too!


 This notepad matches the purse I made for our Vice-Principal.

This stamp case went to our Health Clerk.  I had two of my girls deliver it.

Here you can see the inside of the notepad.
Every time I see these, the advice is to always go to an office supply store, and they will cut the notepads down to size. 
I work at a SCHOOL!!!  We have guillotine cutters, and I cut it from the back cardboard back about half of the pad, turned it over, and cut the front.  It fit like a charm. SO if you're making these notepad holders, ask one of your child's teachers.  They just MIGHT cut the notepads for you!

If you'd like to purchase any of the products to duplicate this project as gifts, click on the product, and I would be happy to be your Stampin' Up demonstrator!
Thank you!