Showing posts with label SU Stamps-Papillon Potpourri. Show all posts

Friday, June 17, 2016

New Catalog (2016-2017) Event Samples 10

Over the past 2 years or so I've made MANY Card-in-a-Box(s)...  many many many!  I love them.  They are relatively easy once you have the dimensions for cutting and scoring.  The engineering is not terribly difficult, it just takes a little know-how.  I'll have a tip for you at the end of this post.

Even though this is the 10th post of Event Samples, This is one of the first pieces I made.  I am not very happy with the Happy Birthday banner on the front, and I'll change that.  I WILL change it. :)

 This is the project where I came up with the idea for using the Sprinkles punch pieces as balloon strings. :)  Maybe one of my later samples will have some on a card....

The awesome thing about these Cards in Boxes is that they fold up into a regular A2 envelope.

TIP:  I keep a 3-subject 5 Star notebook.  In the folders, I keep typed up directions I receive, or things I've printed online.
On the pages, I keep diagrams, drawings, directions, and plans for projects.
It's a great resource.

HERE is a link to a written and pictorial tutorial on a Card-in-a-Box...  the directions are great, and this one is closest to what you see above.
What I did was take these directions, and write them for myself in my 5 Star Craft notes so all I need is my notebook, and I don't have to search around online when I want to make one, or five, or twelve! :)

The products I used:

Tuesday, June 24, 2014

New Thank You, and a Tutorial

It's been a very long time since I posted a tutorial... and I have "trick" I've been using to make my Stampin' life SO much easier!!

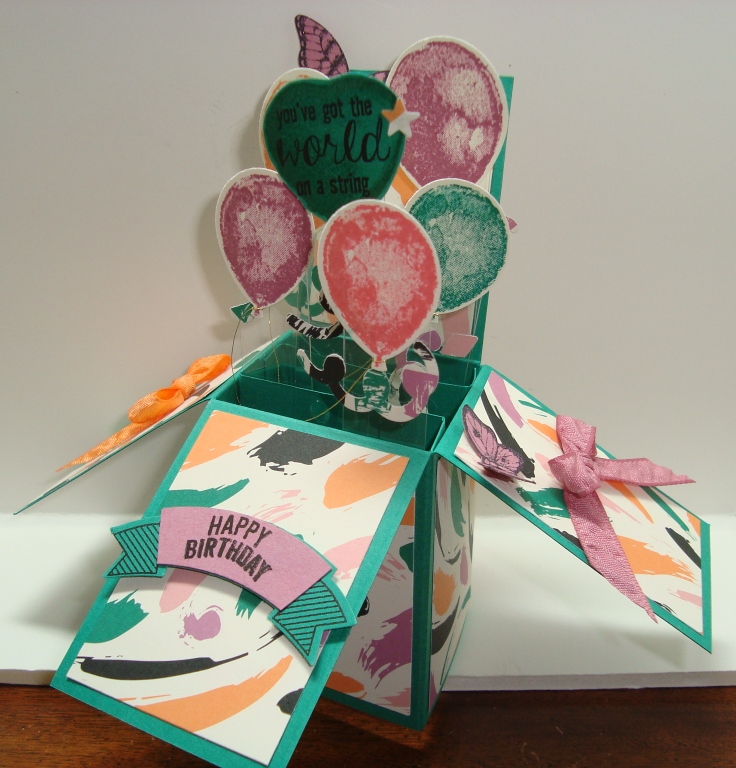
First, the Thank You card.
I'm still on my rainbow colors kick - So bright and cheery!
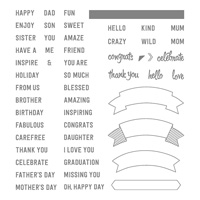
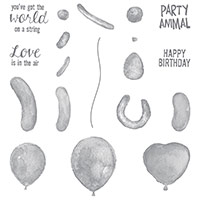
I used the Work of Art, Papillion Potpourri, and Watercolor Thank You stamp sets...
Real Red, Tangerine Tango, Daffodil Delight, Wild Wasabi, Pacific Point, and Lovely Lilac (ret.) as my colors, with Smoky Slate for the Thank you.


Now for the tutorial section of this post!

Do you LOVE your clear stamps, but have a hard time keeping them stuck to the blocks?  It didn't really bother me too much, but it really was horribly annoying when we would do events, and the stamps just wouldn't stay on the acrylic blocks!

I love clear stamps because:  1. they take up much less space  2.  I seem to stamp straighter with them 3.  They take up MUCH less space  4.  Have I mentioned they take up much less space!  I can store them so easily.

This is the solution to this very frustrating problem.  It works GREAT, and takes only a few seconds to do.
 Anytime I get a new stamp set, I place the stickers of the images on the stamp, and then take my Zig pen (pictured below) {the small one} and run some of the adhesive over the top of the stamp.  You can see the lines in the picture above.
Zig pens are wonderful things!!!  They say 2 way glue, and they really do work!  The larger one I use to restick my Cricut mats (see the 'Articles for Everything Cricut'  section) and the smaller ones for gluing small pieces, and paper piecing when I'm working with my Cricut.

Run some of the glue over your stamps (the part with the picture that sticks to the block).  You don't need that much!  Just apply a thin film, and set it aside.  I usually let them sit a few hours or overnight to dry.  Now you have a stamp that won't fall off the block when you're using it, and will peel off when you're finished cleaning it!

I'd love to know how this works for you!


 photo enjoybermudabay.jpg

Thursday, June 12, 2014

Niece's Birthday!

My nephew's wife is having her Birthday today!

Happy Birthday, Alex!

For her card, I used all of our new In-Colors.  I CASE'D this card from one I saw - and made just a few changes.  I didn't notice it at first, but the flower stamps - Petite Petals have one that looks like it could be leaves!  I stamped that first on the background and adhered the flowers on top.

Colors?  With Gorgeous Grunge stamps, Mossy Meadow, Lost Lagoon, and Hello Honey.
The flowers are stamped in Blackberry Bliss, and Hello Honey.
Note:  The Blackberry is so dark I stamped off for the Happy Birthday, and used a water pen to color in the petals on the flowers and butterfly.
The other flowers are Tangelo Twist, and Hello Honey.
Rhinestones all around, of course!


 photo enjoybermudabay.jpg

Thursday, May 15, 2014

Happy Nurse's Day!

This design was CASE'D from another card I saw online.  I love all things brightly colored and sparkly - and loved this card from the first moment I saw it!

This card uses the new stamp set from Stampin' Up available June 1st in the new catalog.  I was fortunate enough to received it at the end of April at the Catalog Reveal event.  It was very exciting, and it's always fun to have a new stamp set to play with.

Colors?  Top down, I used Melon Mambo, Tangerine Tango, Daffodil Delight, Wild Wasabi, Pacific Point, and Wisteria Wonder.  Each of the butterflies was stamped with the coordinating color, punched, and uses 2 rhinestones as their bodies.

I made 2 of these, almost identical, one for our Health Clerk Kathy, and our Nurse Devin.
Thank you for everything you do for us, ladies!


 photo enjoybermudabay.jpg

Sunday, April 13, 2014

Mother's Day Card-in-a-Box

I am very fortunate to have a few people at my work that make requests of me, either card-making, craft-making, or baking.

This is part 2 of an order I received for a Mother's Day Card-in-a-Box. 

 The base card stock is Crisp Cantaloupe, with paper from a DCWV stack for the blue, and glitter blue mat pieces.

The tulips are colored with a blender pen -  Daffodil Delight with Crushed Curry accents; Bashful Blue with Marina Mist accents, and Crisp Cantaloupe with Coral accents.  The butterflies use the same colors, in marker.

Click HERE to watch a video on how to make these AWESOME boxes that fit into a regular A2 envelope!  SHABAM!  That just cracks me up!  So funny.


 photo enjoybermudabay.jpg

Wednesday, March 12, 2014

Card in a Box - Balloons

After playing around with the Card in a Box technique, I decided to make one with my very favorite tropical colors.

Daffodil Delight, Melon Mambo, Lovely Lilac (ret.), Peach Parfait (ret.) and Tempting Turquoise.

I found this combination while playing a game on Facebook, and thought how amazing they would look together.  After playing with them for quite awhile, I used this combination on an August calendar, and lots of other projects.

 I used window sheets and glue dots to make the balloons 'fly'.  The butterflies and sentiment all use the same colors.


I just couldn't resist a picture of this butterfly, using all the colors listed above.  After I've stamped, colored, punched, and added rhinestones, I like to add Diamond Stickles to give the butterflies extra sparkle!
 photo enjoybermudabay.jpg


Monday, March 10, 2014

Card in a Box 2

The base for this card, is Crisp Cantaloupe - seemed perfect for a spring-y bouquet of tulips!

My parents went on a trip to Europe a few years ago, and mom had MANY bulbs sent back from Holland.  They visited a very well-known tulip market.  When they arrived she had them planted in 2 areas of the yard.  When they bloomed - it was an explosion of color!  Every spring she has a huge bloom of the tulips around the yard.

After using this stamp a few times, I thought it would be perfect for the Card in a Box technique!


 All the tulips are colored with the blender pen - Pear Pizzazz and Wild Wasabi for the leaves, and Crisp Cantaloupe, Calypso Coral, Daffodil Delight, Crushed Curry, Bashful Blue, and Marina Mist for the Tulips.   I also used the same colors in marker for each of the butterflies.
 There isn't a die cut for the tulips, so they are each hand-cut.  It didn't seem to take very long at all to cut each of the flowers... I made this on a Saturday crafting day when my friends were over, so the cutting went along with great conversation!

Here you can see one of the ways to fold up the card to place in a regularly sized envelope.  I love how the flowers look when it's folded too!
I've started using a 4 1/4 by 5 1/2 inch piece of cardstock to cover the card and protect the embellishments during mailing.  It seems to work, and the envelope isn't torn as badly - especially with brads, or rhinestones.

 photo enjoybermudabay.jpg

Friday, March 7, 2014

Card in a Box with a link to a Tutorial

I do so love learning new crafting techniques!

One of the girls from my card club brings samples she makes in other groups.  We lit upon this Card in a Box she made.  

I've seen them before, but as you know, in person it's always more stunning!

HERE is the tutorial I watched to get measurements, and tips on making these gems.  Have paper and pencil ready so you can write down your own instructions.  Doing this helps me immensely!  I can remember watching the video while I reread my written directions.

One very AMAZING thing with these cards - they fold up to fit into a regular A2 envelope! 


 I (again) used my DSP Gingham Garden - I really love that paper!  It's so versatile, and the bright colors are usually what I favor in my crafting.
 Main colors:  Pear Pizzazz card base, Daffodil Delight, Melon Mambo, and Island Indigo.  I used the same colors on the larger butterflies - coloring them with markers, rhinestone bodies (as always) and then some Diamond Stickles to make them glitter.
 The larger flower centers are PK Glitz embossing glitter on regular brads...  Burgundy, Azure, and Honey.  The smaller flowers have rhinestone centers.
 Love that butterfly stamp and punch combination! 


 photo enjoybermudabay.jpg