Showing posts with label SU Stamps-Painted Petals. Show all posts

Thursday, May 12, 2016

Satchel Purse Refill Card

Have I EVER mentioned how much I love the Painted Blooms DSP from Stampin' Up?  Ever?  I was sad it was only out for a few months last year.  I made sure I have enough stash to use it for a very LONG time to come!

This card is a refill for a Birthday Satchel Purse I made earlier this year for my teacher partner.  She's the Reading teacher, and I cover the Math.  No, I did not make one for our Social Studies/Science teacher.  I didn't think he would appreciate a paper purse full of cards. :)

I really love this new Thank You - it comes from a new stamp set that debuted in January, and is continuing in the 16 - 17 catalog.  You'll see it often on cards this year!

I don't get to use my Gold Wink of Stella much, but it worked perfectly on this card. 

If you'd like to make a version of this card using different DSP, contact me, and I'll help you put together a super combination of DSP and stamps to make beautiful Thank You cards!
Click on any of the products below to order through my Stampin' Up Demonstrator site!

Saturday, May 7, 2016

AMAZING Satchel Purse

This is one of many of these Satchel Purses I've made.  It has to be 8 or 10 so far, and probably 6 since January, 2016 alone.
I decided that all the ladies in my close circle would receive these as birthday gifts this year.  As a matter of fact, as I write this, the next one is in the planning stages because it has to go out in the mail soon to arrive on time.
You will find a link to this amazing Satchel Purse project at the end of my post.

 I'm using retired paper, Painted Blooms.  It is by far some of my favorite Designer Series Paper Stampin' Up has put out since I became a demonstrator.  A few years ago I was in love with another flowered paper, but this one is above and beyond any I've seen.
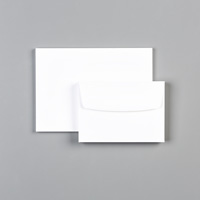
 This gift has many components, BUT all you need are 4 sheets of cardstock, and 5 notecards with envelopes to make it!  1 sheet of DSP of your choice, 2 sheets of colored cardstock, and 1 piece of white or vanilla depending on the DSP base color.
 With the Satchel Purse construction, you also make a Post It note holder (pictured below) and 5 notecards,  the two pictures above.  3 of the portrait card version, and 2 of the landscape card version.

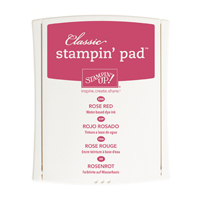
I made two of these purses last weekend...  The one showing is with a Rose Red base, and the other purse has the tulips and a Melon Mambo base.  They are essentially the same, just with different backgrounds.

This past week was teacher appreciation week, and I decided to make one each for my Principal and Vice Principal.  They are awesome ladies, and work their hardest to help us out in the classrooms as much as they can.

I was very excited to present this to my Principal on Wednesday - she appreciates my crafting so much, and once took a class from me.  She knows the amount of work these types of gifts take.  I love doing crafting for her.  It makes me happy.

Click HERE to find the link to the original post in which I found the directions for these AMAZING Satchel Purses!  Scroll down until you find Satchel Purse (6/15).  The directions are VERY good!  Step by step with diagrams and all!

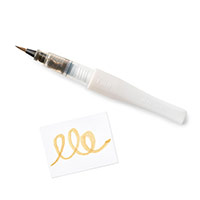
If you'd like to purchase any of these amazing, high quality crafting tools, click on the link below, and you can purchase through my Stampin' Up Demonstrator site.
Thank you so much!

Sunday, January 3, 2016

Thank You Cards

Again this year I received some wonderful Christmas gifts from students.  I spent an afternoon making these Thank-You cards.


I really enjoy using the Thanks die - you can put almost any design on the card, and the die-cut adds that perfect detail to the card!

Sending thanks to the parents and students for wonderful, thoughtful Christmas gifts! 


 photo enjoybermudabay.jpg

Thursday, June 18, 2015

More Painted Blooms

At the card class I gave, we made 8 cards, so each attendee had a choice of 2 more cards from the following selection.

The first one looks complicated, but it really isn't.  The most difficult thing was putting the bow together, and that's just fun - and lots of glue dots!!


I love all the cards, but this last one uses the strip you cut off to make the One-Sheet Wonders posted 2 days ago, so there was no waste! :)


 photo enjoybermudabay.jpg

Tuesday, June 16, 2015

Painted Blooms DSP One Sheet Wonders

When I first saw this paper, I fell in LOVE LOVE LOVE!

As I've said before,  I went back to the classroom full time, and it really put a CRAMP in my crafting time! That said, when I saw this paper, I really wanted to have a class and let others learn how amazing this paper is!

I don't do many classes...  this was my 2nd one, I believe.  Maybe it was the third.  I can't remember, it's been so long! 

 The story behind this Designer Series Paper is that this sheet was painted by a designer, and then used as 2 of the sheets in our 12x12 paper pack.

There was a tutorial on Pinterest, and I thought this would be a wonderful class for card-makers of all levels.
Above, I put the cards back in the same order as the original sheet.
Below you can see all 6 cards made with this one sheet of paper with some additions and embellishments.


More in the next post using other sheets from the DSP pack.


 photo enjoybermudabay.jpg

Wednesday, May 27, 2015

More Painted Petals

I merged two stamp sets for this card.
Painted Petals and
Butterfly Basics
 I used my Stampin' Up markers to make this very colorful card.  Daffodil Delight, Blackberry Bliss, Bermuda Bay, and Melon Mambo.  I stamped the flowers twice, reinking with the markers for each stamping.  I then added the Wild Wasabi leaves.
The butterflies are stamped off once in each color listed above, punched, and added to the card with dimensionals.


 photo enjoybermudabay.jpg