Thursday, April 25, 2013

Commissioned Project - Signature Book

A little over a month ago, one of my colleagues came to me about putting together a signature book for one of our very special teachers who was chosen as our Teacher of the Year!

I work with some of her students, have been in some meetings with her and know exactly how fantastic she is!  SO.....  after my normal amount of 'thinking time' for a big project like this, and one false start, this is what I came up with.

The main theme is Spring and along the way  incorporated some of her personal likes/activities.   My Cricut got a good work-out on this project.  Almost every page has Cricut cuts, lettering, and lots of goodies.

 On the front cover I used my Cuttlebug quilled flowers with some lettering from the Plantin Schoolbook cart and lots of inking and Stickles!  If you look closely, you should see the 'fade' inking with 3 shads of pinks.

 I discovered that she is crazy for OSU, and you'll see it incorporated around the book.  The inside cover will be used as a dedication page from the staff.

 Here's another variation on the spring theme with Stampin' Up flower trim, Cricut cuts, and a flower border I found at HL.
*As I was working on the project, I sent out an email to my colleagues looking for some words they would use to describe her and incorporated them into the pages, either cut with different Cricut fonts or stamped and added to the pages.


 These two pages include Stampin' Up doilies I inked and a stamp set with the framelits dies to cut the words.  The Iris stamp comes from another company using the tole technique of layering.  I stamped 5 of these, colored and layered them.

 Here you see another one of the descriptive words from colleagues, a flower border, and a Cottage Cutz die I bought in Tennessee when we were traveling.  I also layered this one, inked, and used the Stickles!

 This page was originally going to be butterflies, bees, and ladybugs, but it seemed WAY too busy, so this is what I came up with.  LOVE these bees!  So pretty!

 Just an OSU page!

 Here we have yellow daisies with blingy centers, white doilies, one of those adjectives, and a fork bow!

 Our campus has a sister school in China with which we have visit exchanges!  Every year they bring students here in October, and we take a group of students in early May.  She's been lucky enough to go to China with this project and will go again, I'm sure!!

This is the last page of the book....  she and her husband are travelers!   Found that out at one of the meetings, and I just had to include it since we are big travelers as well.  AND of course, some more OSU.

I hope you've enjoyed my take on a signature book.... a very specialized signature book!

Cricut Cartridges used:  1.  Walk in My Garden, 2.  Plantin Schoolbook, 3.  Lyrical Letters, 4. Calligraphy Collection, 5.  Pagoda, 6.  Sentimentals
All ink:  Stampin' Up.


Sunday, April 21, 2013

Flip-Flop Wreath!

Saw this wreath on Pinterest, and I just HAD to make it!!  It's so cute, and is the perfect combination of tropical colors!!!


Added the other "flip" tonight to make the wreath complete!  My neighbors stopped by, and the little girl (about 7) looked up at it and said, "WOWWWWW!"  Her Mom and I got a good laugh because it was SO cute!! :)


 Materials sources:  Patterned flip-flops - Target, solid flips, flowers, and all 'bling' jewels from Michael's.


 Hot Glue gun, Glue dots, and E-6000 adhesive on a sturdy white-foam wreath.

It was really fun to make, and my 2 crafting friends were over, so we had lots of fun, and as always, 3 opinions work well to make a project GREAT!!!

Thanks Melissa and Dee!


Friday, April 5, 2013

2013 Christmas Card Challenge - April!


April!  Has Spring arrived or is Old Man Winter hanging on where you are?  We've got a mix - 80° one day, 30° the next - snow predicted, but the daffodils are blooming, and my grape hyacinths are up in the flower bed in front of the house.  Who knows what's next?  Spring?  I hope so - Christmas might be my favorite holiday, but Spring is my favorite season.

Let me jump right into the theme for April:  Christmas Icons!

Sounds strange, doesn't it, but when I searched online - there were thousands of images!  Then I really started getting ideas!  Put it this way... I didn't make 6 cards this month. ;)

SO, just for inspiration, I have some of the images I found online.  Here they are:


Alright - on to my samples for April's challenge.  I mentioned that I didn't just make 6 cards this month, I actually ended up with 20, or I should say I STOPPED at 20!

We didn't travel this year for Spring Break, so I had the whole week to play in my craft room in addition to some other things I wanted to get accomplished.

OK, for my first 6 cards - a Christmas Door - what's more iconic to Christmas than a door with a wreath on it?  We made these at a Stamp-A-Stack this past November, and I really loved 'em!  Isn't that antique brad doorknob cute?  I used 2 different brads.


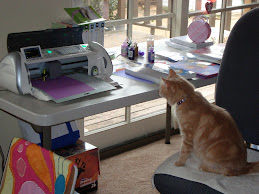
 The wreath was made with the 'new' 1 1/4" scallop punch and a 3/4 inch scallop punch from some of my green scraps.  Gotta LOVE using scraps when you can! Above you can see my craft table.  NO, it's never clean - I just can't work in clean.  It isn't possible. ;)

For the next set of 6 cards, I got out my Jolly Bingo Bits stamp set and had to choose!  There are 24 in all, and in a moment you'll see how I incorporated a few others for the inside and envelope.  They make wonderful Inchies!  I also added some rhinestones and Stickles to add some interest.

 Click HERE for a link on how to make these awesome, easy, quick bows!

 Here you've got the envelope and inside view of these mini-icon cards.
"No naked envelopes" is a quote I heard from Shelli Gardener at the Regional in Dallas last month - It resonates - 'naked envelops' - LOL


Here is the last set - I actually made 8 of these in total 2 of each design, and one red and one green for each icon.
These are a shameful CASE from another Stampin' Up Demo with some of my own touches added.  I remember clearly when I first saw them.    Enjoy!


 Yes, the gingerbread men, trees, cocoa cups, and candy canes hold the card fronts together!
Below is a picture of the inside - I made an extra die cut from the original cardstock for the backing to give it extra strength.

 Here are the envelopes - giving just a little hint of what's inside.


Please leave a comment. Thanks so much!


Sunday, March 24, 2013

Easter Cards 2013

 This stamp set is called Everybunny, and the wheel is Every Egg.

Truthfully, I didn't really consider this set for quite awhile when the catalog came out, but after looking at it and thinking of possibilities, I jumped in and ordered both.

The technique is called a Stair Step Card, and uses a Martha Stewart grass punch, as well as my Spectrum Noir markers.  LOTS of Spectrum Noir markers, as you will see. :)

The two bunnies and hot air balloons weren't so daunting, but when I stamped and started on the egg border, I almost didn't finish it - it took me 3 1/2 days of work to get all the egg borders colored.  On top of that, I fussy cut each one.  Just a comment about that - I really do love how the alcohol markers blend!  They give such pretty effects.

Why so daunting?  I made 7 of these cards for family members.  They went out in the mail this past week, so they should have arrived by now.

 The sentiment, Happy Easter is actually on the back - it just didn't quite fit on the front of the card! :)

Every Egg border (including the two individual eggs-cut off to fit card front)
HB1,2,3; CT1,2,3; CR1,2,8; PP1,2,4; TB1,2; LG1,2,3,4; TN1,2; and BT1,2.

The boy bunny:  TB1,2,6; CT1,2 LY1,3; LG2,3,4; HB1,2,3; BT1; PP1,2; and IG1
The girl bunny:  TN2,3; LY1,3; PP1,2; LG2,3; and BP 1
Hot Air Balloon:  HB1,2,3; PP1,2; TN1,2; LG1,2; PP2,3; BT3,4.

Please leave a comment. Thanks so much!


Saturday, March 23, 2013

Card for a College Friend


 My husband talks a lot of crap about Facebook - he doesn't like it, and uses it begrudgingly... but I really enjoy FB... I can keep in touch with teacher friends from around the country, and most important, keep in touch with cousins I haven't seen in more than 25 years or so.

It also affords me the luxury to keep up with college friends!  I really loved college - it was a great time!

One of my roommates made a comment on FB that her Mom is ill - and after seeing some of her posts, I decided to send her some cheer.


I don't generally make religiously themed cards, but this one was completely appropriate, and I LOVE how the pink and green work together.

Click HERE to see the other gift I sent along with her so she could have some notes to send to her Mom when she couldn't be with her.

BONUS:  HERE is a link on how to make these bows.... SO easy!!  So pretty!!!


Please leave a comment. Thanks so much!


Tuesday, March 19, 2013

February Stamp Club - March!

 Our February Stamp Club meeting was cancelled because of a "snowstorm" here - lots of precautions, and icy roads, so it was just better for everyone to move it one week later.  What a difference a week makes!

Instead of 2 cards this month, we had some that were quick assembly, so there were 3 designs. 

 This one is my favorite by far - LOVE the design and colors!  So vintage with the color scheme - Rich Razzleberry and Crumb Cake with lace embossing, and lace over the darker ribbon.  Even the pearls are 'treated' with Razzleberry.

The next two cards use the Sale-A-Bration paper selection called Sycamore Street.  The apothecary label is a nice background for the butterfly.  I chose not to use a stamp on this so I could customize it as I choose.
I really love this Happy Birthday stamp.... so pretty!


Please leave a comment. Thanks so much!


Tuesday, March 5, 2013

2013 Christmas Card Challenge - March!


Has March "come in like a lion" where you are?  It has here to a degree.  We've been unfortunate enough the past 2 years to have received very little snow.  It's been VERY cold and it's always windy, so I guess that could be considered  "a lion" in some respects.  Spring in certainly on its way, BUT the Christmas Cards keep rolling on here as I am never far out of the Christmas spirit! :)

This brings us to our March challenge!
Since March tends to be so busy - meetings, conferences, Spring Break, planting; or at least planning for it, etc. We still will have our challenge, but you can make it as simple or as complicated as your time allows.

The challenge for March is:  Your cards must include the colors Red, Green and White ONLY! 
They must contain all 3 colors, but no others - no gold or silver accents, no peeps of pink, etc.  Red, Green, White.

I thought about these for quite awhile - and used lots of details as you can see, but got the lot of 6 done in one evening!!  Here they are:


I had some R,W,G Christmas papers that worked perfectly.  DCWV paper stack of course! :)  The circle Joy stamp comes from Inkadinkadoo (I believe), and the rest of the papers, ink, etc. all come from Stampin' Up.

I used some retired products to make this card, just because they were perfect.  Glorious Green Craft ink (ret.) with clear embossing powder, Red satin ribbon (ret.) and a square of red cardstock to mat the stamped piece.


Above you can see the 6 cards for this month's challenge, and below the completed inside of the card, and the stamped envelope to complete the set.


Come join me and have your Christmas Cards all finished before Thanksgiving, ready to sign and send with time spent only to address the envelopes!

Even if you don't have a blog of your own, there are lots of ways to get your photos uploaded for the challenge.

Click HERE for all the rules and regs. for this challenge!


Please leave a comment. Thanks so much!

Sunday, March 3, 2013

Special Order - Sympathy Cards

 One of my coworkers approached me a few weeks ago and asked if I make sympathy cards.  I've made a few in the past, it was always for a friend or family event.

I never find them easy, but they always seem to have flowers.  I dug around in my stash, and found this flower stamp I haven't used in awhile.  I used my alcohol markers to work on the colors, and a technique for the purple paper....  not sure what it's called, but if you look closely, it has a fuzzy appearance.

I also stamped 6 images and colored each to make the 2 pink cards, and 6 images each to make the blue cards.  Why so many?  I hand cut each one of the extra images and layered them on top of the base image.  I then used a dotted background technique from a challenge from the Designed To Color site.


 Click on the photograph below to see a closer view of all the layers for each flower and leaf.

 Click on the photograph below to see a close-up view of the flower's layers.


Please leave a comment. Thanks so much!