Friday, July 18, 2014

Christmas in July - July 18, 2014


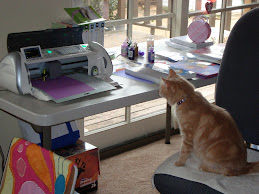
The card for today features a die-cut Merry...  I received a Stampin' Up order of some bits and pieces of things I needed for projects, and I took advantage of lots of items on the Clearance Rack!  There is a set of 3 Thinlits dies;  Thankful, Merry, and Love.

One tip I'll pass along to you - make sure you use a small piece of waxed paper between your cardstock and the die.  It will make removing the cardstock MUCH easier!  :)  Yes, I did remember to do that when I cut "Merry".
I used a piece of DSP from the Candlelight Christmas stack, and used a hand-tied bow. 

I know I'll use this "Merry" quite often!  So pretty!


 photo enjoybermudabay.jpg

Thursday, July 17, 2014

Christmas in July - July 17, 2014


 I've been working hard on the Christmas cards for this challenge even though I haven't written that much about each card.  Some have been simple and straight forward, but not this one!

This really wasn't that difficult to make, it just uses a lot of different techniques and materials.


This is an Easel card, embossed with silver embossing powder over a Heartfelt Creations stamp I like to use... it's pretty and frilly.
I then die cut the center piece, and stamped and embossed a tree in green ink, and then the silver embossing powder on the top piece.
I used another die to cut the stopper piece from the bottom front edge to give it dimension as well.
I had a stamped Merry Christmas piece to place on the front, but placed it in the back instead.  I will add another embossed Merry Christmas stamp at the base in the front.

I have a battery powered candle behind the vellum.  This card will either be hand delivered, or sent in a box because of it.


 photo enjoybermudabay.jpg

Wednesday, July 16, 2014

Christmas in July - July 16, 2014


As I did yesterday, here is another piece from the Work of Art stamp set we received at the catalog reveal.  I stamped off each Cherry Cobbler and Garden Green except one - near the center of the card is fully inked.

This is one of my very favorite Merry Christmas stamps!  It's old, and long retired.  I removed it from the wood block and backed with the foam mount so I'm able to keep it with a set of other Christmas stamps.  So much easier to find that way!


 photo enjoybermudabay.jpg

Tuesday, July 15, 2014

Christmas in July - July 15, 2014


This card features a background I used in a card earlier in the spring, and during our new catalog event on June 14th.  Here I'm using Christmas colors - Cherry Cobbler, and Garden Green as the background.

I stamped the Jolly Bingo Bits pieces, punched them out with the 1 inch circle, then opposite colors of cardstock for the backing 1 1/4 inch scalloped circle mat.  I like to add Cranberry Stickles to the bingo pieces... and a rhinestone for the tree's star.


 photo enjoybermudabay.jpg

Monday, July 14, 2014

Christmas in July - July 14, 2014


My card today is a very simple card.  I believe it took me less than 10 minutes to make, and I still can't decide if I want to add a bow to this, or just leave it as it is.

This card uses the flocked window sheet from Candlelight Christmas DSP.  I backed it with a piece of vanilla cardstock, and added a sentiment at the bottom.

In person, it looks fantastic just as it is.  I'll most likely take it to my card club and ask if they have any ideas.


 photo enjoybermudabay.jpg

Sunday, July 13, 2014

Christmas in July - July 13, 2014


It's a Card in a Box!  I really love these, and actually forgot how much!

I have two dear friends that come and craft with me on weekends, but now that we're on summer vacation, it actually works better to meet up during the week.  We sit around for the afternoon and make cards or other projects we have going on.  I usually make a snack or food for lunch - because I like to try out new recipes I find on Pinterest, or that I see on Food Network - and they are my best sounding board if they are keepers or not.

SO, that being said, one of my friends brought her sister along to join us!  It was really great to meet Michelle, and I along with the other girls helped her make her first Card in a Box!  After going through all the directions, I decided to make a Christmas version.

Here it is.
 I'm still using the Be of Good Cheer paper, and broke out the Jolly Bingo Bits stamp set and my stickles.

Here I again used the 3 layer punches for the sentiment, but in addition to the Artisan Label, and word window, I added the 1 1/4 scallop circle punch.

These are really so much fun to make!  I couldn't find my transparency sheets, but the red seemed to work just fine.  The best part about these - they fit in a regular A2 envelope!!


 photo enjoybermudabay.jpg

Saturday, July 12, 2014

Christmas in July - July 12, 2014


For today's card, I'm still using my favorite DSP - Be of Good Cheer and the hexagon punch for a simple card.
It's a 4-3-2-1 design, with Cherry Cobbler seam binding ribbon, a strip of Cherry Cobbler card stock I had from another card, and a 3 piece layered sentiment using the Artisan punch, large oval, and the word window punches.
I used a Pigma pen to add straight stitches along the edges of each hexagon.


 photo enjoybermudabay.jpg

Friday, July 11, 2014

Christmas in July - July 11, 2014


I haven't used this stamp before.  It comes from the same set as the Santa image I used for yesterday's card (7-10-14).
I LOVE it!  I can't get over how beautiful this stamp is!  Looks like a wood cut.  

After inking the stamp with Cherry Cobbler ink, I used my blender pen to remove the red ink from the ivy leaves - then used my Garden Green marker to ink that part of the stamp.  I was worried a bit about color transfer, but it worked like a charm.  I added some Cranberry Stickles on the berries.

I had some other images to add to this card, but they just didn't look right.  Do I add ribbon?  Rhinestones? OR just leave it as it is.  I really love it just like this. 


 photo enjoybermudabay.jpg

Thursday, July 10, 2014

Christmas in July - July 10, 2014


 I have fond memories as a child of Santa coming on Christmas Eve to Grandma's house to deliver our presents in person.  He came after we returned from our Christmas Eve program at church, and before my cousin's left for Midnight Mass... he timed it just SO well!  ;)

I'm sure this is one of the biggest reasons I love Christmas so much.

I have a teacher friend who will receive this card, or another Santa card I'll make during the year.  This will be the third, I believe.  Her son got a hold of the first one I sent to them, and kept saying that Santa had written to him!
She told me he wouldn't relinquish it!  So, every year, I make sure to send a Santa card. 

I believe this picture comes from the mid-70s... just look at that hair on Mom!  Hi Mom! :D
Santa would read "Twas the Night Before Christmas" to us, talk to the group of cousins, have a drink with the adults, and then pass out our presents.  I put a couple of these pics up on Facebook, and we (all the cousins) had an amazing conversation about all our memories.  Turns out one of my older cousins does the same thing for her grandchildren!
 AWESOME!


 photo enjoybermudabay.jpg

Wednesday, July 9, 2014

Christmas in July - July 9, 2014


This rather simple card comes from 2 CTMH (Close To My Heart) stamp sets I've had for awhile.  I love the hexagon punches for quilt patterns, but this is more traditional.  I've seen this so many times on quilts over the years, I knew I'd have fun playing with it.

I love the Jingle stamp... so cute!

It doesn't really seem like they work well together, but in person, it's a cute card.  I'm considering adding ribbon - rhinestones... not sure yet. 


 photo enjoybermudabay.jpg

Tuesday, July 8, 2014

Christmas in July - July 8, 2014


I'm going to admit that starting Christmas in July cards last year wasn't bad.  I had so many ideas and the extra time since I'm off in the summers it was pretty much a breeze!

This year, on the other hand, I wasn't so sure.  I looked at the calendar this past Monday, July 7th after getting caught up from our 2 week vacation, and I wasn't so sure I'd be able to make 24 more Christmas cards... they are each one different from the others.  No duplicates in this bunch of 31, unlike my monthly Christmas Cards where I make one design, and 6 identically designed cards.

Well, after looking through my stash of stamps and 'goodies', I realized I have enough stamps and stuff to keep me busy making Christmas cards for a VERY long time!  YAY!
This card is primarily made of Washi Tape.  I used my Stampin' Up grid paper to make sure the tape was lined up straight - it looks awful when it's crooked!  I did keep the white spaces uneven for interest.

The punched piece is layered - the Decorative Label, Large Oval, and Word Window, as well as the Teeny Tiny Wishes stamp.

A tip I got from a fellow stamper gave me the idea for the polka dotted oval.  Layer Washi Tape on white cardstock, and then punch!  It made a very nice coordinated background.


 photo enjoybermudabay.jpg

Monday, July 7, 2014

Christmas in July - July 7, 2014


I saw this picture online, and I just had to share it!
 Sometimes, you just get that Christmas "JOY" that washes over you - no matter what!

My card for today fits this picture, as you'll see in a moment.

REALLY sorry for the head-tilt needed to view this card...  the camera on my phone forgot about Blogger's idiosyncrasies, and I took the picture the wrong way.  I can assure you it won't happen again.

HERE it is!!  I took the picture again, and made sure I was in the correct camera mode.

This card actually took me about 10 minutes to put together.  Regular A2 card base, 3 3/4" square patterned paper, 3 1/2" square overlay, cut with the tree die cut.  Adhere all the layers, using dimensionals on the very top piece.  A double bow at the top, and a sentiment at the bottom, and it's a Christmas card!

Even though this was quite an easy card to make, I really love the design.  I hope you do too, and yes, I'm sorry about the crick in your neck.  :)


 photo enjoybermudabay.jpg