Monday, November 17, 2014

Christmas Trees!

When I saw this stamp set, I HAD to have it!!!
I am crazy for Christmas trees.....  we have a 9 footer for the living room, I have a ceramic tree from my grandmother that my mother made on our sideboard (which stays out all year), and I have a collection of them that either stay out year-round, or come out after Thanksgiving until near Valentine's Day.

This stamp set is called Festival of Trees - it's also a clear stamp set, and so easy to use and line up the images!!!  This also comes as a bundle with the tree punch.  So easy to make beautiful cards quickly and easily!
After stamping the trees in Garden Green, I used the dots accent in Daffodil Delight, Pumpkin Pie, Real Red, and Pacific Point for the lights on the trees.

The snow is a Cuttlebug folder, inked with Soft Sky and the entire card is sprayed with Tattered Angels glitter mist. 


 photo enjoybermudabay.jpg

Saturday, November 15, 2014

Christmas Cards 2014


No, I haven't forgotten about making Christmas Cards!

As I said, this teaching full time really cuts into my crafting time!  I finally feel like I'm getting my head above water... so I've taken some time to get back to it (a little).  I still don't like it one little bit.
 This wreath was the first WOW I saw in the fall/Christmas Holiday catalog.  It's right at the beginning when you open up the catalog (p. 9), and I could see lots of possibilities with this. 

The wreath stamp set is bundled with the die cuts  (don't skip that!) and is a clear stamp set so you can see very clearly where to place the stamps.  I used Pear Pizzazz for the base,  Garden Green for the darker leaves, and Real Red for the berries.  I added Christmas Red Stickles to give the card a little sparkle on the berries.  Cherry Cobbler Seam binding bow, and the Decorative label punch for the Merry Christmas.
The wood grain background is stamped in Crumb Cake.
This card has some of my very favorite things...  the Merry Christmas stamp, and the double seam binding bow.  Yes, I've come around to the seam binding side!  :) 


 photo enjoybermudabay.jpg

Thursday, November 13, 2014

Baby Card in a Box

My aunt and uncle were coming to visit one night on their way to visit my cousin (review the baby shower invitations)...

I'd seen lots of examples of the "new" stamp set Something for Baby, and wanted to make a card I could send along with them instead of sending it in the mail.  I also sent along some things my husband and I got from our local Babies R Us store.  We don't have children, but I LOVE going there!  So much fun just filling the cart with baby stuff you know the new baby and mommy and daddy will need!
 When I got this stamp set, I took a picture of the stack-able toy when we saw it at WM so I'd have a color reference, and I'm glad I did!    Instead of stamping the onsie and duckie, I just used some patterned paper and the die to cut out the shapes.
 
 I love the look of layered punches!  For the front piece, I layered 4!  From back to front, you have the Decorative Label, the Artisan Label, the Modern Label, and 'bundle of boy' is stamped and cut with the Word Window punch.  Whew! 

 Two of the other stamps come from the stamp set "Bundled Baby".  I water-colored and hand-cut those to add as accents.
I love the bear image at the right panel - it's one of the retired Build-a-Bear stamps I use on baby cards.  He's also water-colored.

The main cardstock color I used is Pacific Point from Stampin' Up.  The patterned paper is from a DCWV stack called All Boy.


 photo enjoybermudabay.jpg

Tuesday, November 11, 2014

New Baby!

So I've decided that working full time teaching severely cuts into my crafting time, and I don't like it one bit!
That said,  I was asked to make 70 invitations to a baby shower for my cousin.

I was so thrilled to hear that they are expecting!  The new baby will be a wonderful addition to the family. :)

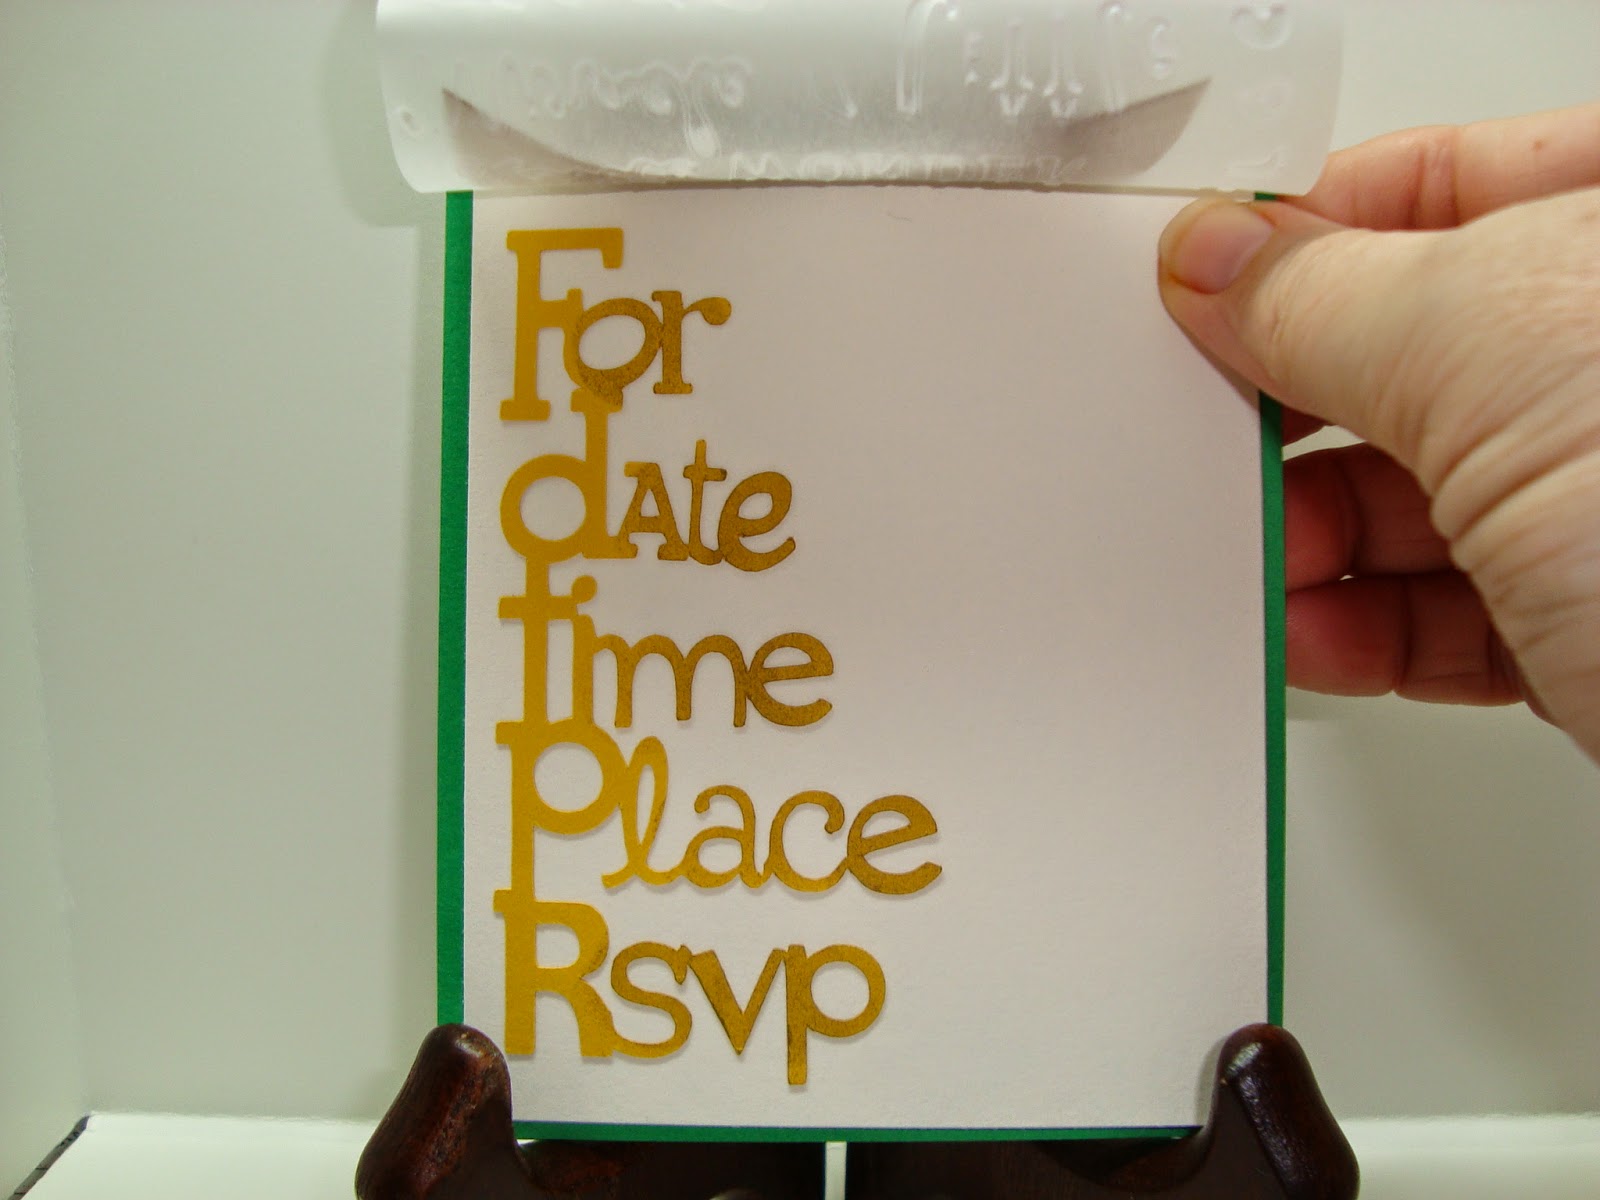
My cousin and his wife wanted green and yellow as the main colors, with a brown accent.  After some thought on this,  I went back to a design I've used before for 1 page shower invitations.
I cut the background invitation piece on my Cricut from the New Arrival cartridge, and inked it in a light brown ink to give it some definition.  The top piece is vellum, embossed with the Cuttlebug "baby" folder.
I ran out of time, so just a few of the vellum overlays had some inking to bring up the details on the embossing.

I used the retired Stampin' Up slot punch on the edges to thread the ribbon.  A little adhesive under the ribbon to keep everything together, and a trick I learned;  tie bows upside down.
I turned the cards away from me so I was looking at them upside down, and the bows all turned out right-side up!  Go figure. 

After assembling them, it took me just a few days to write out all the information needed for the shower.


 photo enjoybermudabay.jpg

Sunday, November 9, 2014

Thank You Card

Mom requested a Thank You card for a friend...


After two reminders (It's been VERY busy here...) I made a card, but hated it.  It's been a long time since I've done any crafting it seems.


So, I dug out my favorite fall stamp set "Gently Falling", and my new favorite  "Work of Art', and merged the two. 

 I like the watercolor look from the Work of Art stamp set.
I used Cajun Craze,  Garden Green, and Smoky Slate as the main colors with a touch of copper Stickles to add some sparkle.


 photo enjoybermudabay.jpg

Friday, August 15, 2014

Gifts for my Father-In-Law...

Christmas gifts in August.
We cannot send the gifts I made for family this past Christmas to my Father-In-Law simply because he wouldn't get them because of where he lives.
 SO, at my husband's request, I prepared these so they could be hand delivered!
 My hymnal is getting low on my favorite Christmas hymns but I did find one that had some meaning. 
My husband and I went to choose the V.  It couldn't be too big so it would fit into the suitcase, or too thin because it might break with the flight...  We settled on an already painted, smaller 3/4 inch thick letter instead of the very thin plywood pieces I usually work with.  As usual, it turned out just fine! :)

I used the Mocha Morning paper stack since browns were requested. 

It's been an incredibly busy week, but I got them finished in time.


 photo enjoybermudabay.jpg

Friday, August 1, 2014

Stampin' Up Club Meeting - July

We have two really beautiful cards from July's Stamp Club!

 This card reminds me so much of a Chinese screen.  It folds to fit easily into a regular A2 envelope.
We stamped the red panels with Versamark ink, then embossed with white, and added Dazzling Diamonds as accents to the center of the flowers.  Black butterflies with either rhinestone or pearl bodies added a very elegant accent to the screen.

We discussed how this could be a really beautiful wedding card, and as I write this, I thought how awesome this would be as a baby card!

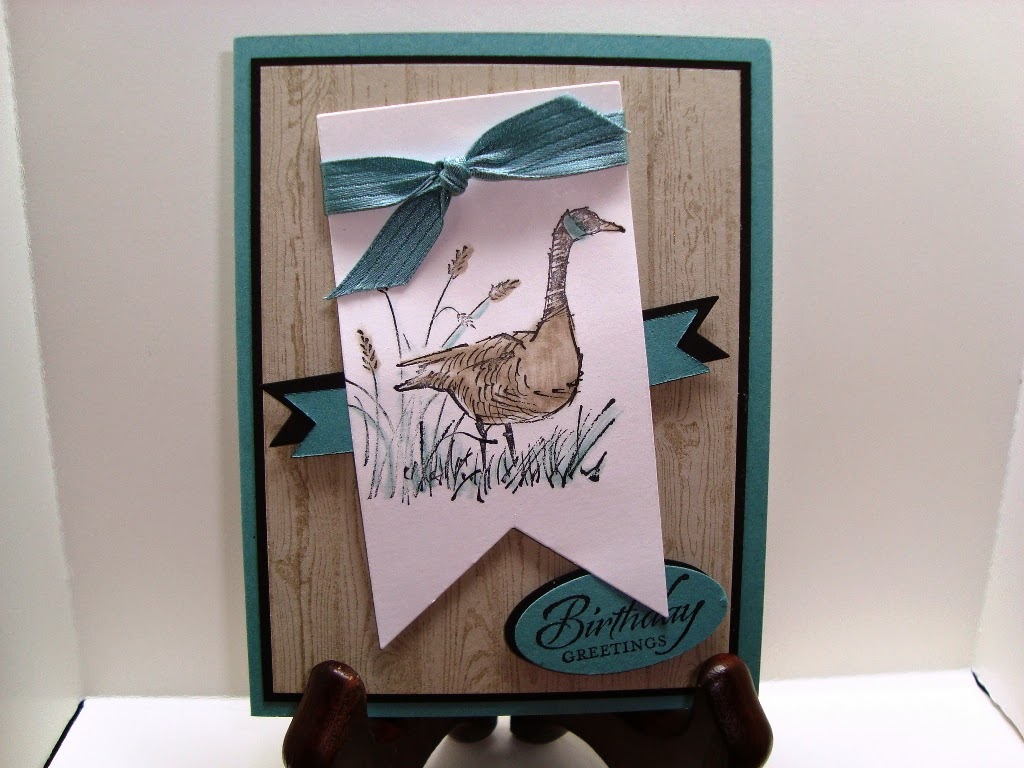
This card features the Wetlands stamp set.  We've now used it twice, and I really like it.  There are lots of options for masculine cards, and the sentiments are very pretty with lots of uses on other cards as well.

This card features the new In-Color Lost Lagoon, lots of framelits, the oval punch, and blender pen coloring on the Canada Goose.

I learned something tonight.  As a child we used to go to the Horicon Marsh in Wisconsin (where I grew up) to see the Canadian Geese on their migration flight.  Ms. Vicky at club tonight told me it's actually a Canada Goose!  I understand from her that Canadians get upset when you call them the 'wrong' thing.  SO  it's a Canada Goose - I guess the plural would be Canada Geese.  We see them flying around our neighborhood often, actually!


 photo enjoybermudabay.jpg

Thursday, July 31, 2014

Christmas in July - July 31, 2014


I did it!
Another Christmas in July challenge I set for myself - One Christmas card for each day of the month with no duplicates during the month.

At the beginning, I wasn't so sure I could do it, but actually, I could keep going!  No - I'm not...  one card a day was tough, but doable... and life tended to creep in and interrupt this year.


 Today's card was an idea from my friend Sonya.  She was over to visit, and I needed one more card idea.  She said, "Why don't you make that fireplace?"  I actually forgot about it!!!  There for awhile, I made MANY of these - cards, challenges, 25 for the December calendar...and so on.

I used more of my Be of Good Cheer DSP for the stockings.  Even though most of my cards this month featured this paper, I used MUCH LESS than one sheet of each design, leaving me with a big stash.  LOVE LOVE LOVE this paper so much!


 So there you have them... my 31 cards - one per day for Christmas in July 2014. 

Let's see what I come up with next year if I again take on this challenge. 
 photo enjoybermudabay.jpg


Wednesday, July 30, 2014

Christmas in July - July 30, 2014


This card features a card form I've used many times - the Stampin up Card Framelits.  LOVE LOVE LOVE them!

You can make them 'short' cut at 4 1/4", or 'tall' cut at 5 7/16"... and decorate so many ways...  limitless!
 The only new piece I cut for this card was the Merry from the framelits.  I had the gingerbread men from the earlier stair-step card (made way too many!), and the Merry Christmas from a scrap I stamped and hadn't used yet.
Here you can see the card opened up to view the inside details.


 photo enjoybermudabay.jpg

Tuesday, July 29, 2014

Christmas in July - July 29, 2014


Does someone want a dress from Santa, or will Mrs. Santa wear this when he returns?  Who knows!
Another scraps card!  I had an extra circle left from the trees (posted earlier this month), and it fit the dress framelit quite well!  I adhered the circle to the edge of a piece of vanilla cardstock, and cut out the full dress.  Layer on some of the ribbon flowers,  a folded piece of Cherry Cobbler for the sash, and a small bow at the waist.  The bow is not so overpowering in person as it is in this picture.
Use markers to color the holly pieces, and Cherry Cobbler ink for "Dear Santa,". 


 photo enjoybermudabay.jpg

Christmas in July - July 28, 2014


 Today's card features Washi Tape!  I have to thank Linda Guild, a Cricut and Stamping friend for this idea.  I've used it often - and came up with this card from a scrap of paper just big enough to fit the stocking punch.
How?  Layer the Washi tape on a scrap of cardstock, then use your punch to cut!  This particular Washi design lined up easily, and when I overlapped the dots, it made a nice continuous design.

I then layered it on a piece of glitter cardstock cut with my Deco label framelits, added some ribbon, and the Merry Christmas.


 photo enjoybermudabay.jpg

Christmas in July - July 27, 2014


 Something NEW!   Some time ago I bought another Cuttlebug Quilled flower - this time from Amazon.  They are not difficult to make by any means - you just need some equipment.  Since I use longer dies, and have 2 other quilled flower pieces, I had what I needed.  You need the long A, B, and C plates.  This technique will also work easily in a Big Shot with the same long plates for the die cuts.

Ok... enough about the supplies.
Here are two of the quilling flowers - Poinsettias.  Instead of using yellow for the centers, I used a scrap of vanilla cs I had, and added yellow stickles to the stamens.

This card has quite a bit of dimension, and will either be delivered in person, or sent in a small box.


 photo enjoybermudabay.jpg