Thursday, July 17, 2008

Get Well Card for Kids...


I started making a Get Well card for a friend, and got the Get Well Soon cut from Beyond Birthdays done in blue, yellow, and red and realized it was pretty cartoonish. I put it aside and made the purple card below.
I thought the cut was cute, so I made a Mickey to go with the sentiment. I thought this turned out really cute... even better since it was unplanned.
Both Get Well Soon and Mickey were cut at 2.5 inches. I used 3M spacers to give dimension to the saying - and Christmas Red stickles on the get well. Mickey's ears are outlined with Black Diamond stickles, and his eyes and buttons have Star Dust stickles.

Get Well Card


This is a Get Well card I made for a friend just getting over some minor surgery. Can you tell she loves purple? I really like this technique... cutting pieces to fit inside each other, and inking the edges... I used my Colorbox inks in the following colors for this project: silver, eggplant, pink, and lavender. I also used Stickles in purple and lavender for this project.


The circle is cut from the Paper Studio scallop punch at 1 7/8 in, and double stamped with a Patricia's Garden flower stamp in lavender and then the sentiment in eggplant. I used the purple sakura glaze pen to highlight the scallops.


Martha Stewart's punch Lace Doily was used on the edges, and inked with the pink Colorbox ink.

Monday, July 14, 2008

Cards for Soldiers Challenge Part 2: Birthday! 7/8 to 7/26


Here is the Aurora I made for this Happy Birthday Challenge. She is cut at 4 inches with Starry Night, Christmas Red, and Platinum stickles. I also used the Yellow and Blue Glaze pens from Sakura. I also added some chalk to add color to her face.

I inked the embossed Happy Birthday background done on the Cuttlebug with Peony (dark pink from the Colorbox Petals collection) to contrast with the blues and yellows on the page. I also inked the edge cut with Martha Stewart's Doily Lace stamp with Sky Blue Colorbox ink. The Happy Birthday was cut from the Zooballoo cartridge using dark and light blue for background and foreground contrast.
Your comments are always welcome!

Cards for Soldiers Challenge: Happy Birthday! July 8 to July 26


This challenge, I signed up for only 15 cards due to time constraints... and I also wanted to raise the quality level on my cards. Here's the 'recipe'.
I cut the Cinderella at 4 inches on my Big Bug (Cricut Expression). Cinderella has Starry Night, Waterfall, and Christmas Red stickles as well as the Yellow and Blue Glaze pens from Sakura. I used my MS Doily Lace punch and inked the edges with the Sky blue Color Box Petal Point Inkpad from the Enchantment set. The background is DCWV paper cut at 4" x 6" and embossed with the Cuttlebug Happy Birthday folder. I also inked the embossing with Sky Blue ink.
The Happy Birthday was cut from the Zooballoo Cartridge, and I cut a scallop from a punch and stamped the cupcake. The other Happy Birthday background is inked with the Heliotrope (lavender) ink to bring up the embossing.
Thank you for looking, and comments are welcome!!

Thursday, July 10, 2008

Non-Cricut Design - Scratch 'n' Sniff Embossing!


I saw this technique on (Marti) Pez-a-Doodle's blog, and LOVED it! It's such a cute idea. I've always loved scratch 'n' sniff stickers so this was a perfect way to make some on cards. She does a great tutorial on her blog.


In addition to the orange, I've also made some lime, lemon, cherry, and strawberry cards just like this only with a few different stamps.

Non-Cricut Card Design - Brayer Technique


The top two images used Kaleidacolor Spectrum ink pad, and the bottom two images used the Baby Powder ink pad.


Ms. Robynstamps (she's SO awesome) from the Cricut Messageboard had this tutorial on her blog, and I LOVED it - after some emails to her with questions, I finally felt brave enough to try. These are my results.
I'm quite happy with them, though they are not perfect.

http://thepinkstamper.blogspot.com/2008/06/fun-brayer-technique-episode-52.html This is the link to her video - with materials and instructions.
I have the Calypso pad as well, and can't wait to try that with the brayer either! Can you imagine using just reds and greens for Christmas cards?? I've already got an idea for that!

Cricut challenge from The Scrapoholic


I was in the middle of a creative slump (a small one) - and asked the messageboard members what they did when they had a creative slump... and the Scrapoholic gave me a challenge!
*1 cut from Cricut, emboss something, use stickles, and 1 piece of ribbon.
This is what I came up with - after altering the card a bit because of a "stickling" mistake... so here it is! I also used my watercolor pencils on a stamp, and no "new" paper - just scraps.

Saturday, July 5, 2008

Disney Cards... Mickey, Ariel, Jasmine


I do a project every 3 weeks on the Cricut Message Board called Cards for Soldiers... I signed up to do 100 cards this last challenge... WHEW! It was A LOT! I enjoyed making them, but have decided that 100 is enough when there's people helping! :) The pictures are of 3 of the Disney Characters... our theme was KIDS - no birthdays... and I know how much kids love Disney!

4th of July Cards...


I sent these out just a few days ago for the 4th of July.

I used the Cricut to make the Star, my Cuttlebug embossing folder "Divine Swirls", blue and red star paper from Hobby Lobby, and the small notecards from Wal-Mart. Most importantly - I used the Studio G stamps (July) I'd been RAK'd by 2 ladies on the awesome cricut MB!

My new Craft spot!

Hey there!

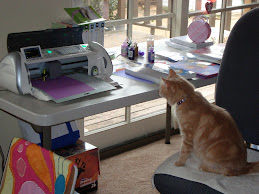
My name is Sue, and I've opened this Craft spot to show all the awesome things I've made with the help of my Cricut, other bloggers, and the amazing Cricut Message Board at www.cricut.com!